Please note: the forum is closed.
No new user registrations are accepted. For more info, please click here.
No new user registrations are accepted. For more info, please click here.
Modifying A5s with IR Automatic Bed Leveling Probe
 willyx
Posts: 2Member
willyx
Posts: 2Member
I have been able to add the IR probe sensor for auto bed leveling in my A5s Model. I was able to find post only indicating how to do the modification in the A5 model but not the A5s so I decided to do this quick guide in case someone else is trying the mod. Let me know if you need more information regarding this guide.
You will need:
Mini IR bed Sensor
Firmware (Attached in this post)
Mounting bracket
M3 Screws
First, you need to verify that the cable for your sensor is long enough. I used 3 lines of flat cable so it can be easily introduced in the chassis without modification.
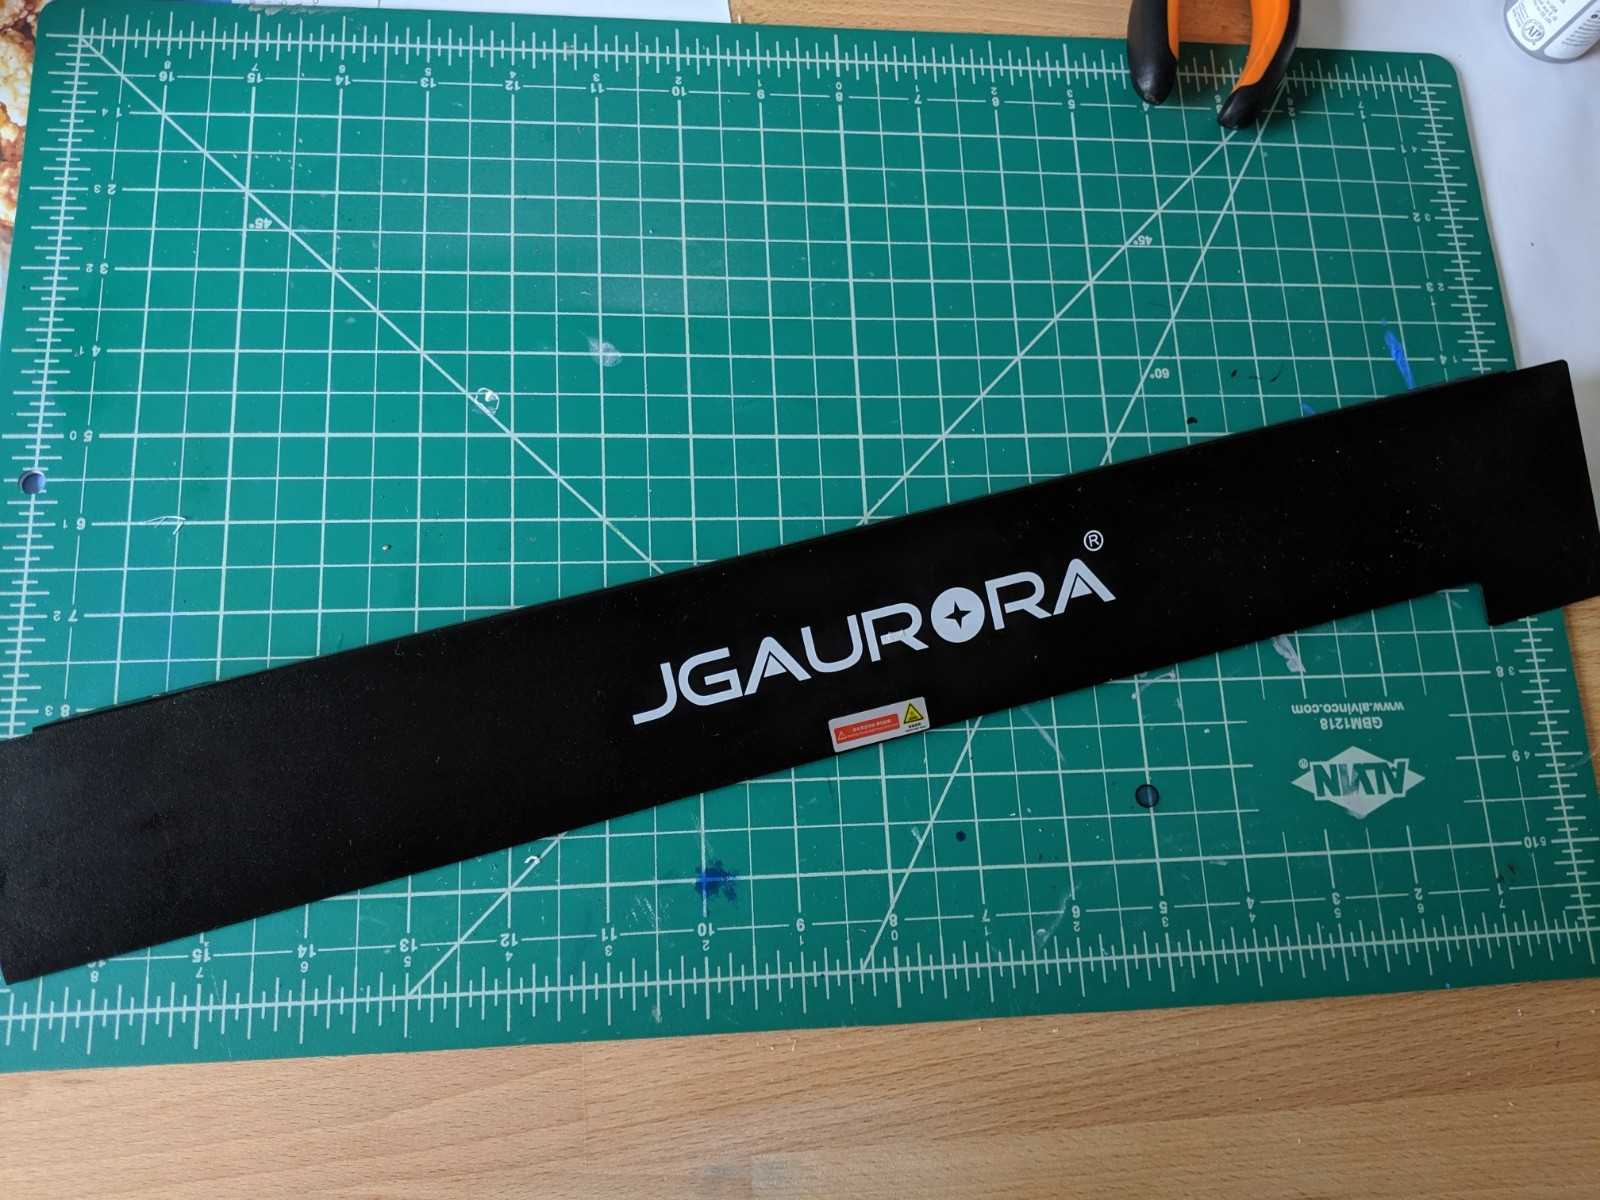
Remove the front bar of the printer so you can mount the sensor with the help of the mounting bracket.
The screews that are in the X-axis aren't long enough to hold the metal part and the printed mounting bracket so you need to use the longer M3 screes
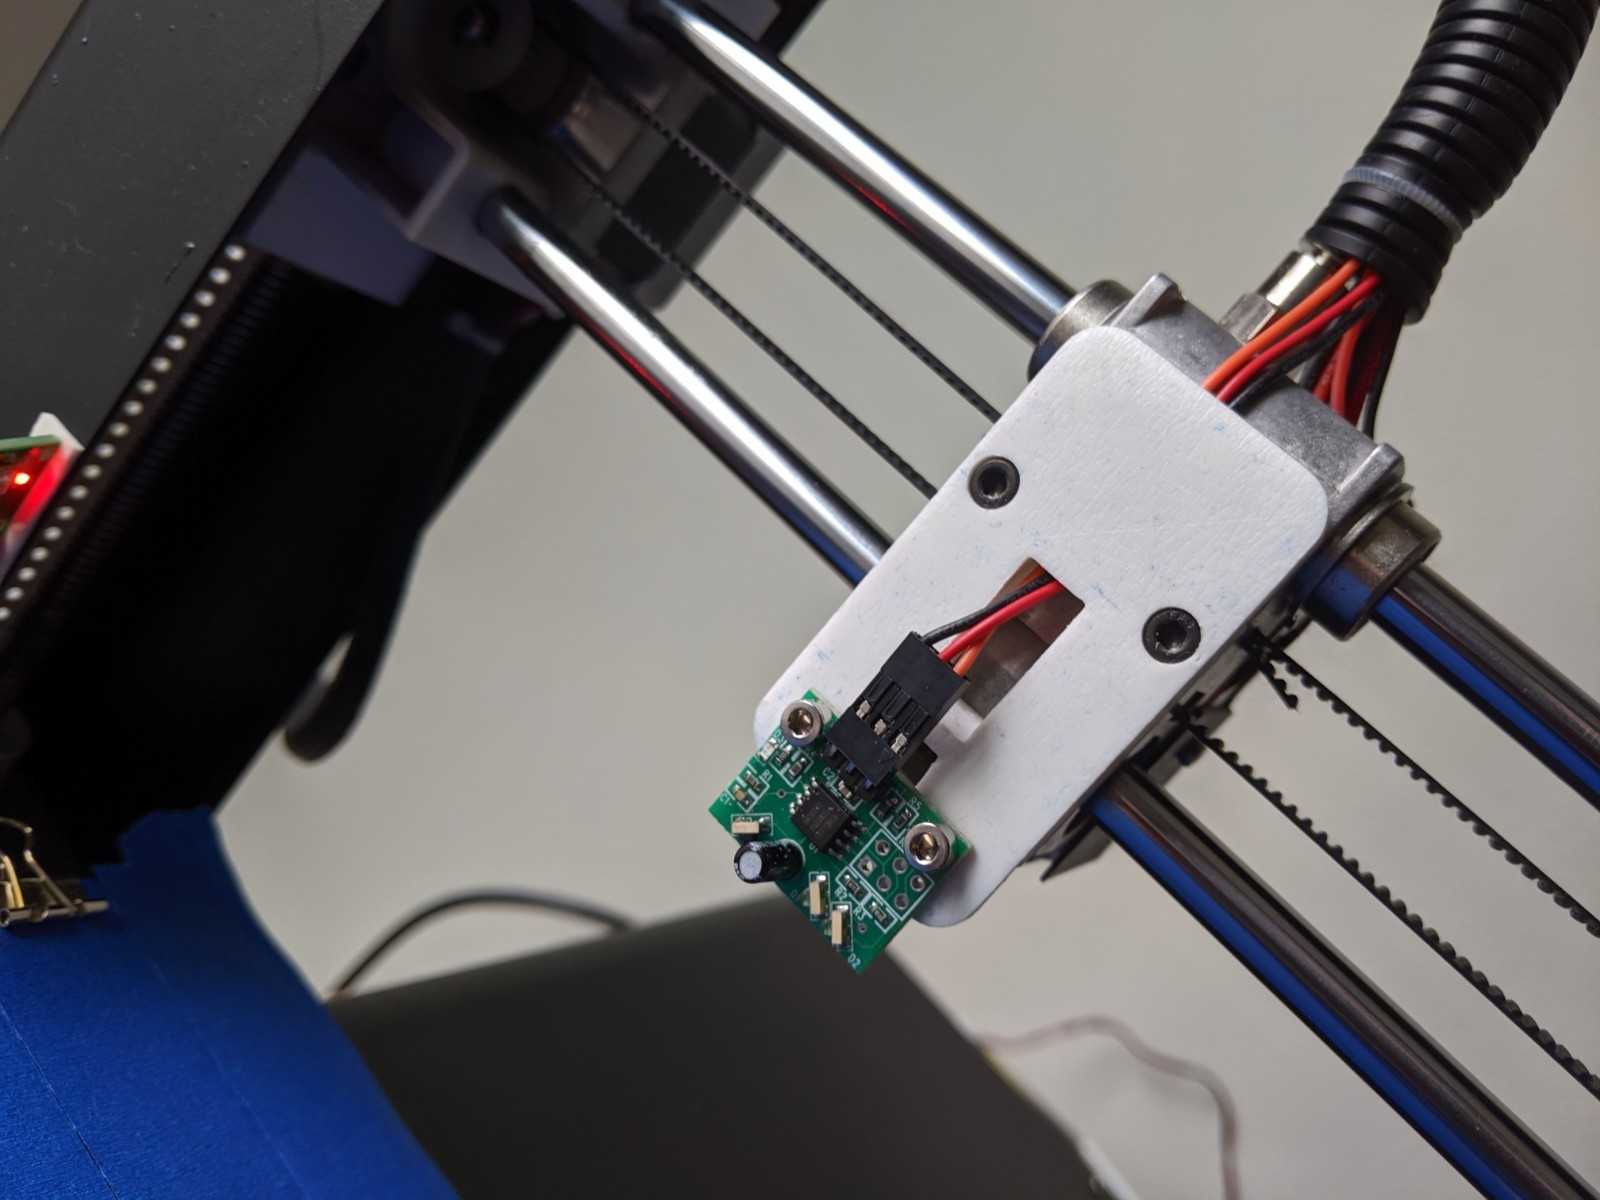
Connect the cable to the sensor. Be very careful on which colors are connected to GND, VCC and OUT signals as documentation sais that the sensor is very voltage sensitive.
Wire the sable through the frame
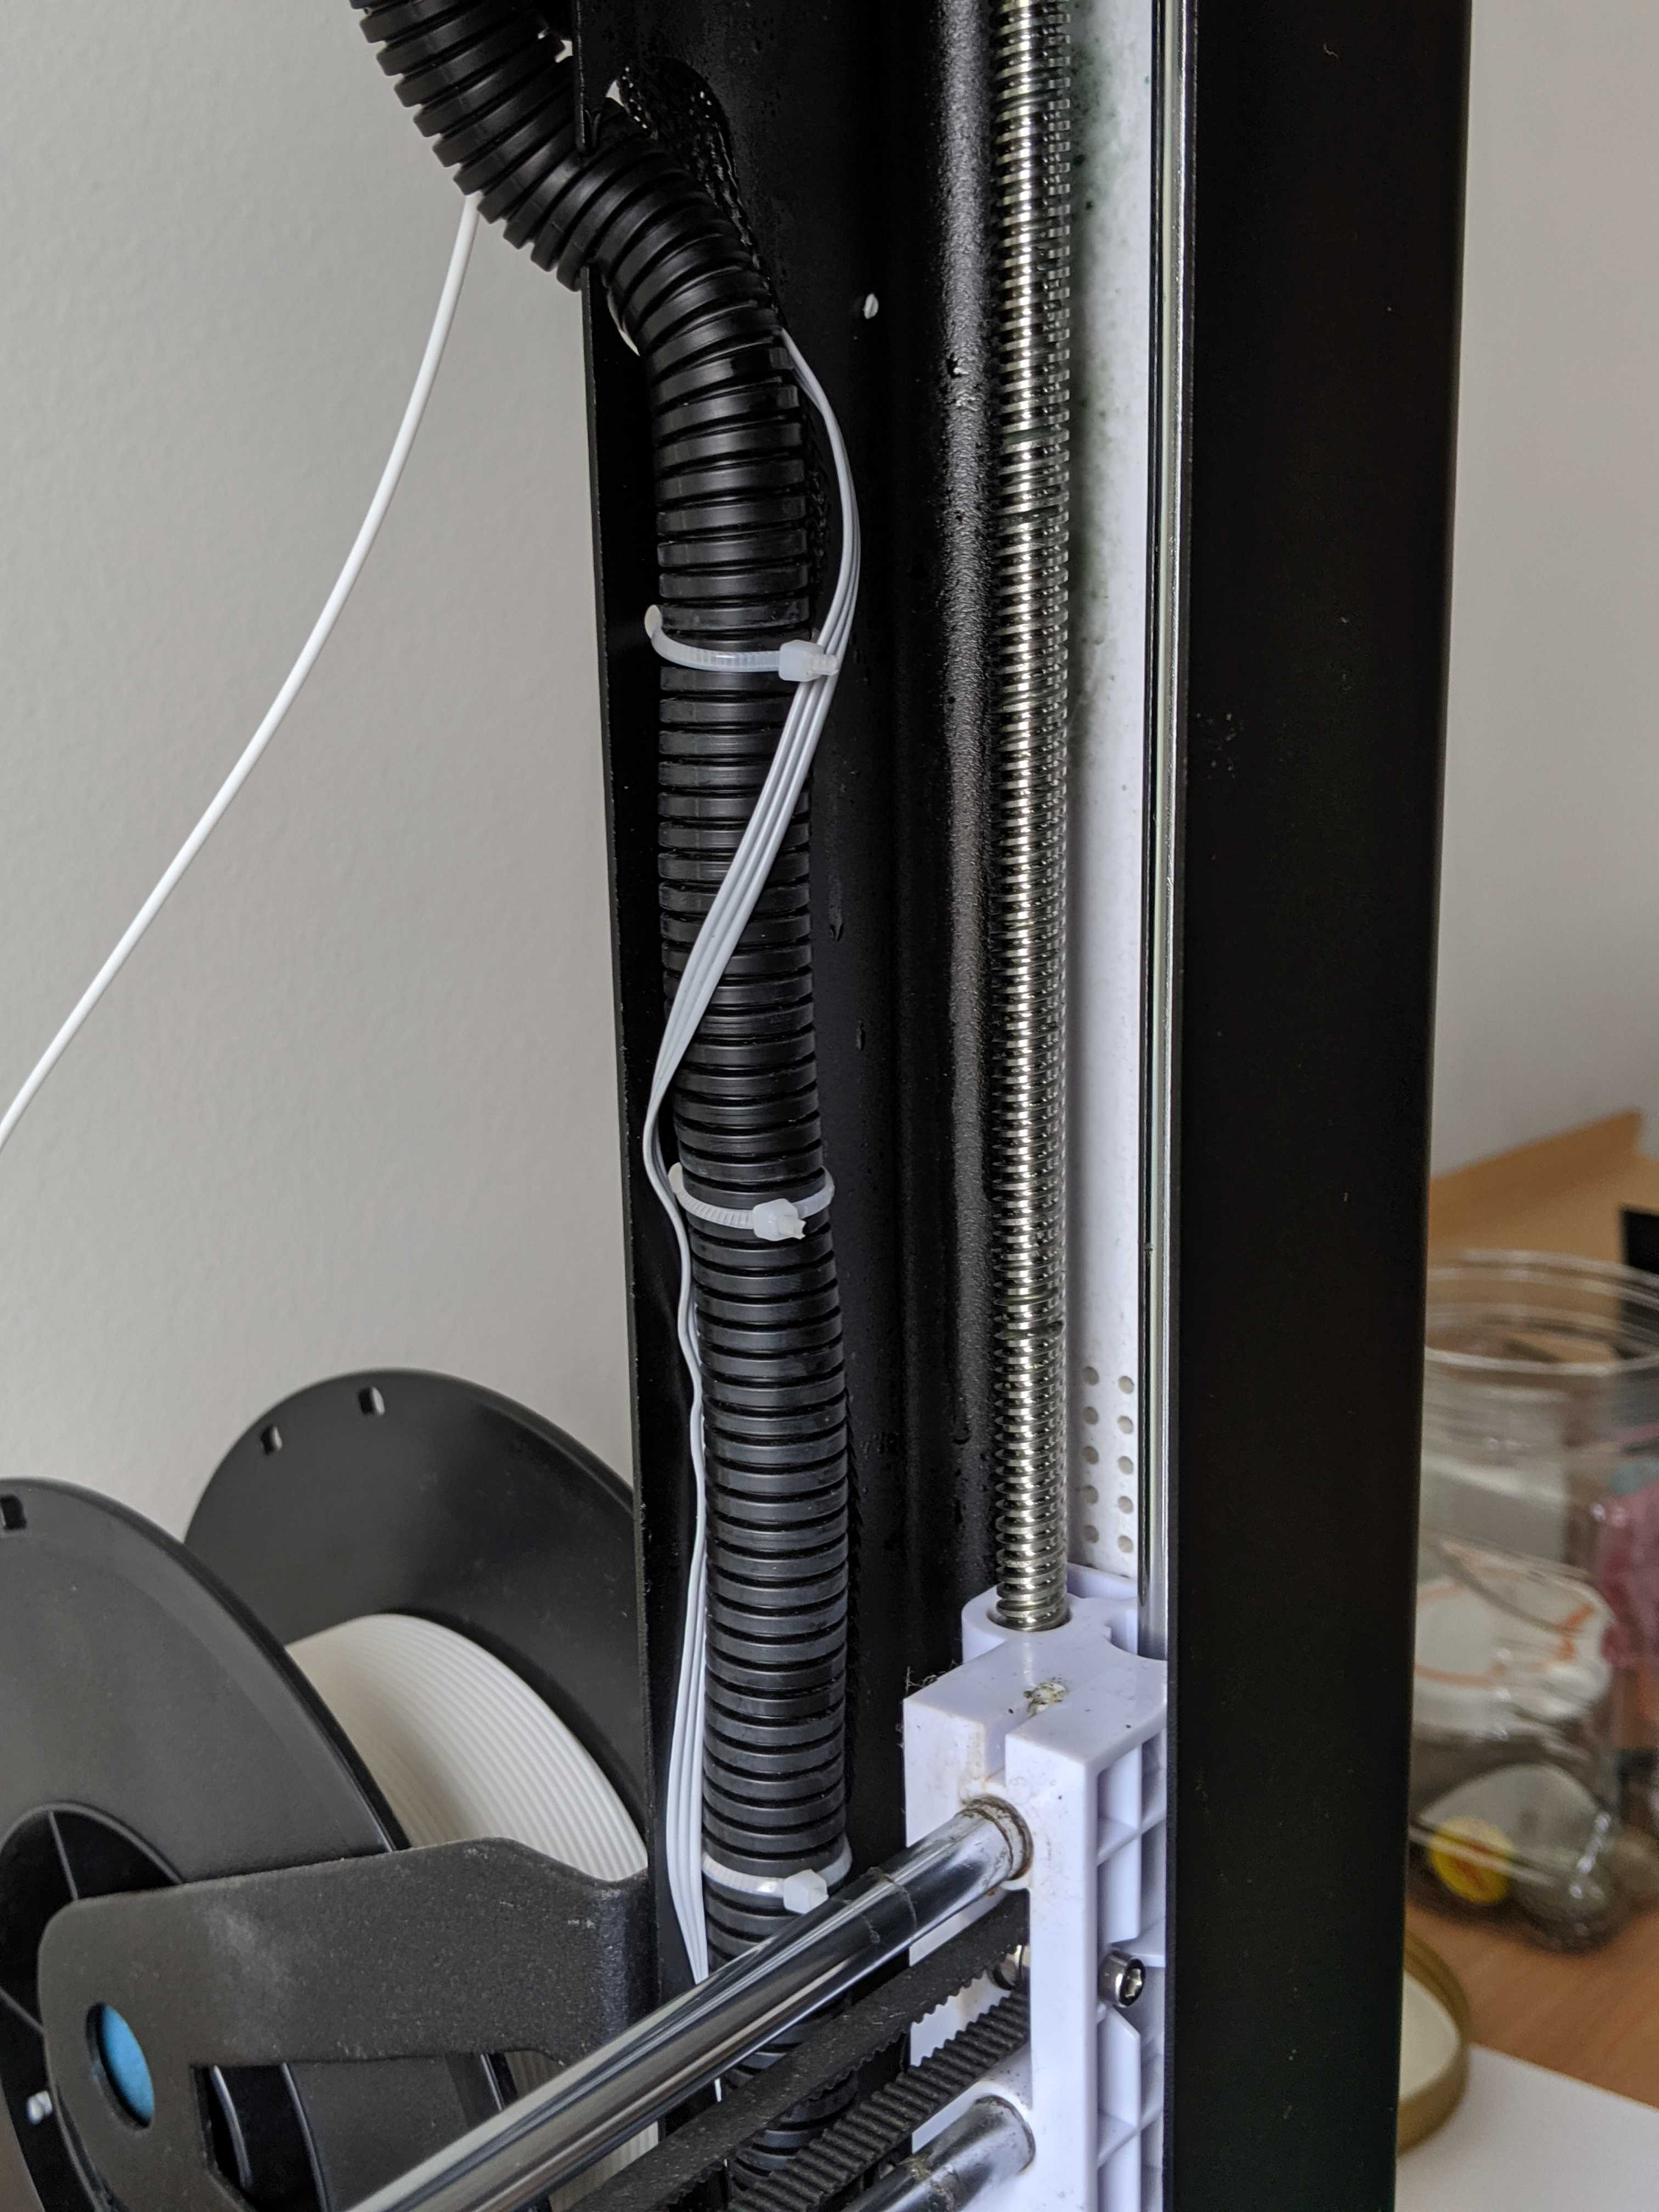
Insert the flat cable through the holes already made for other connectors
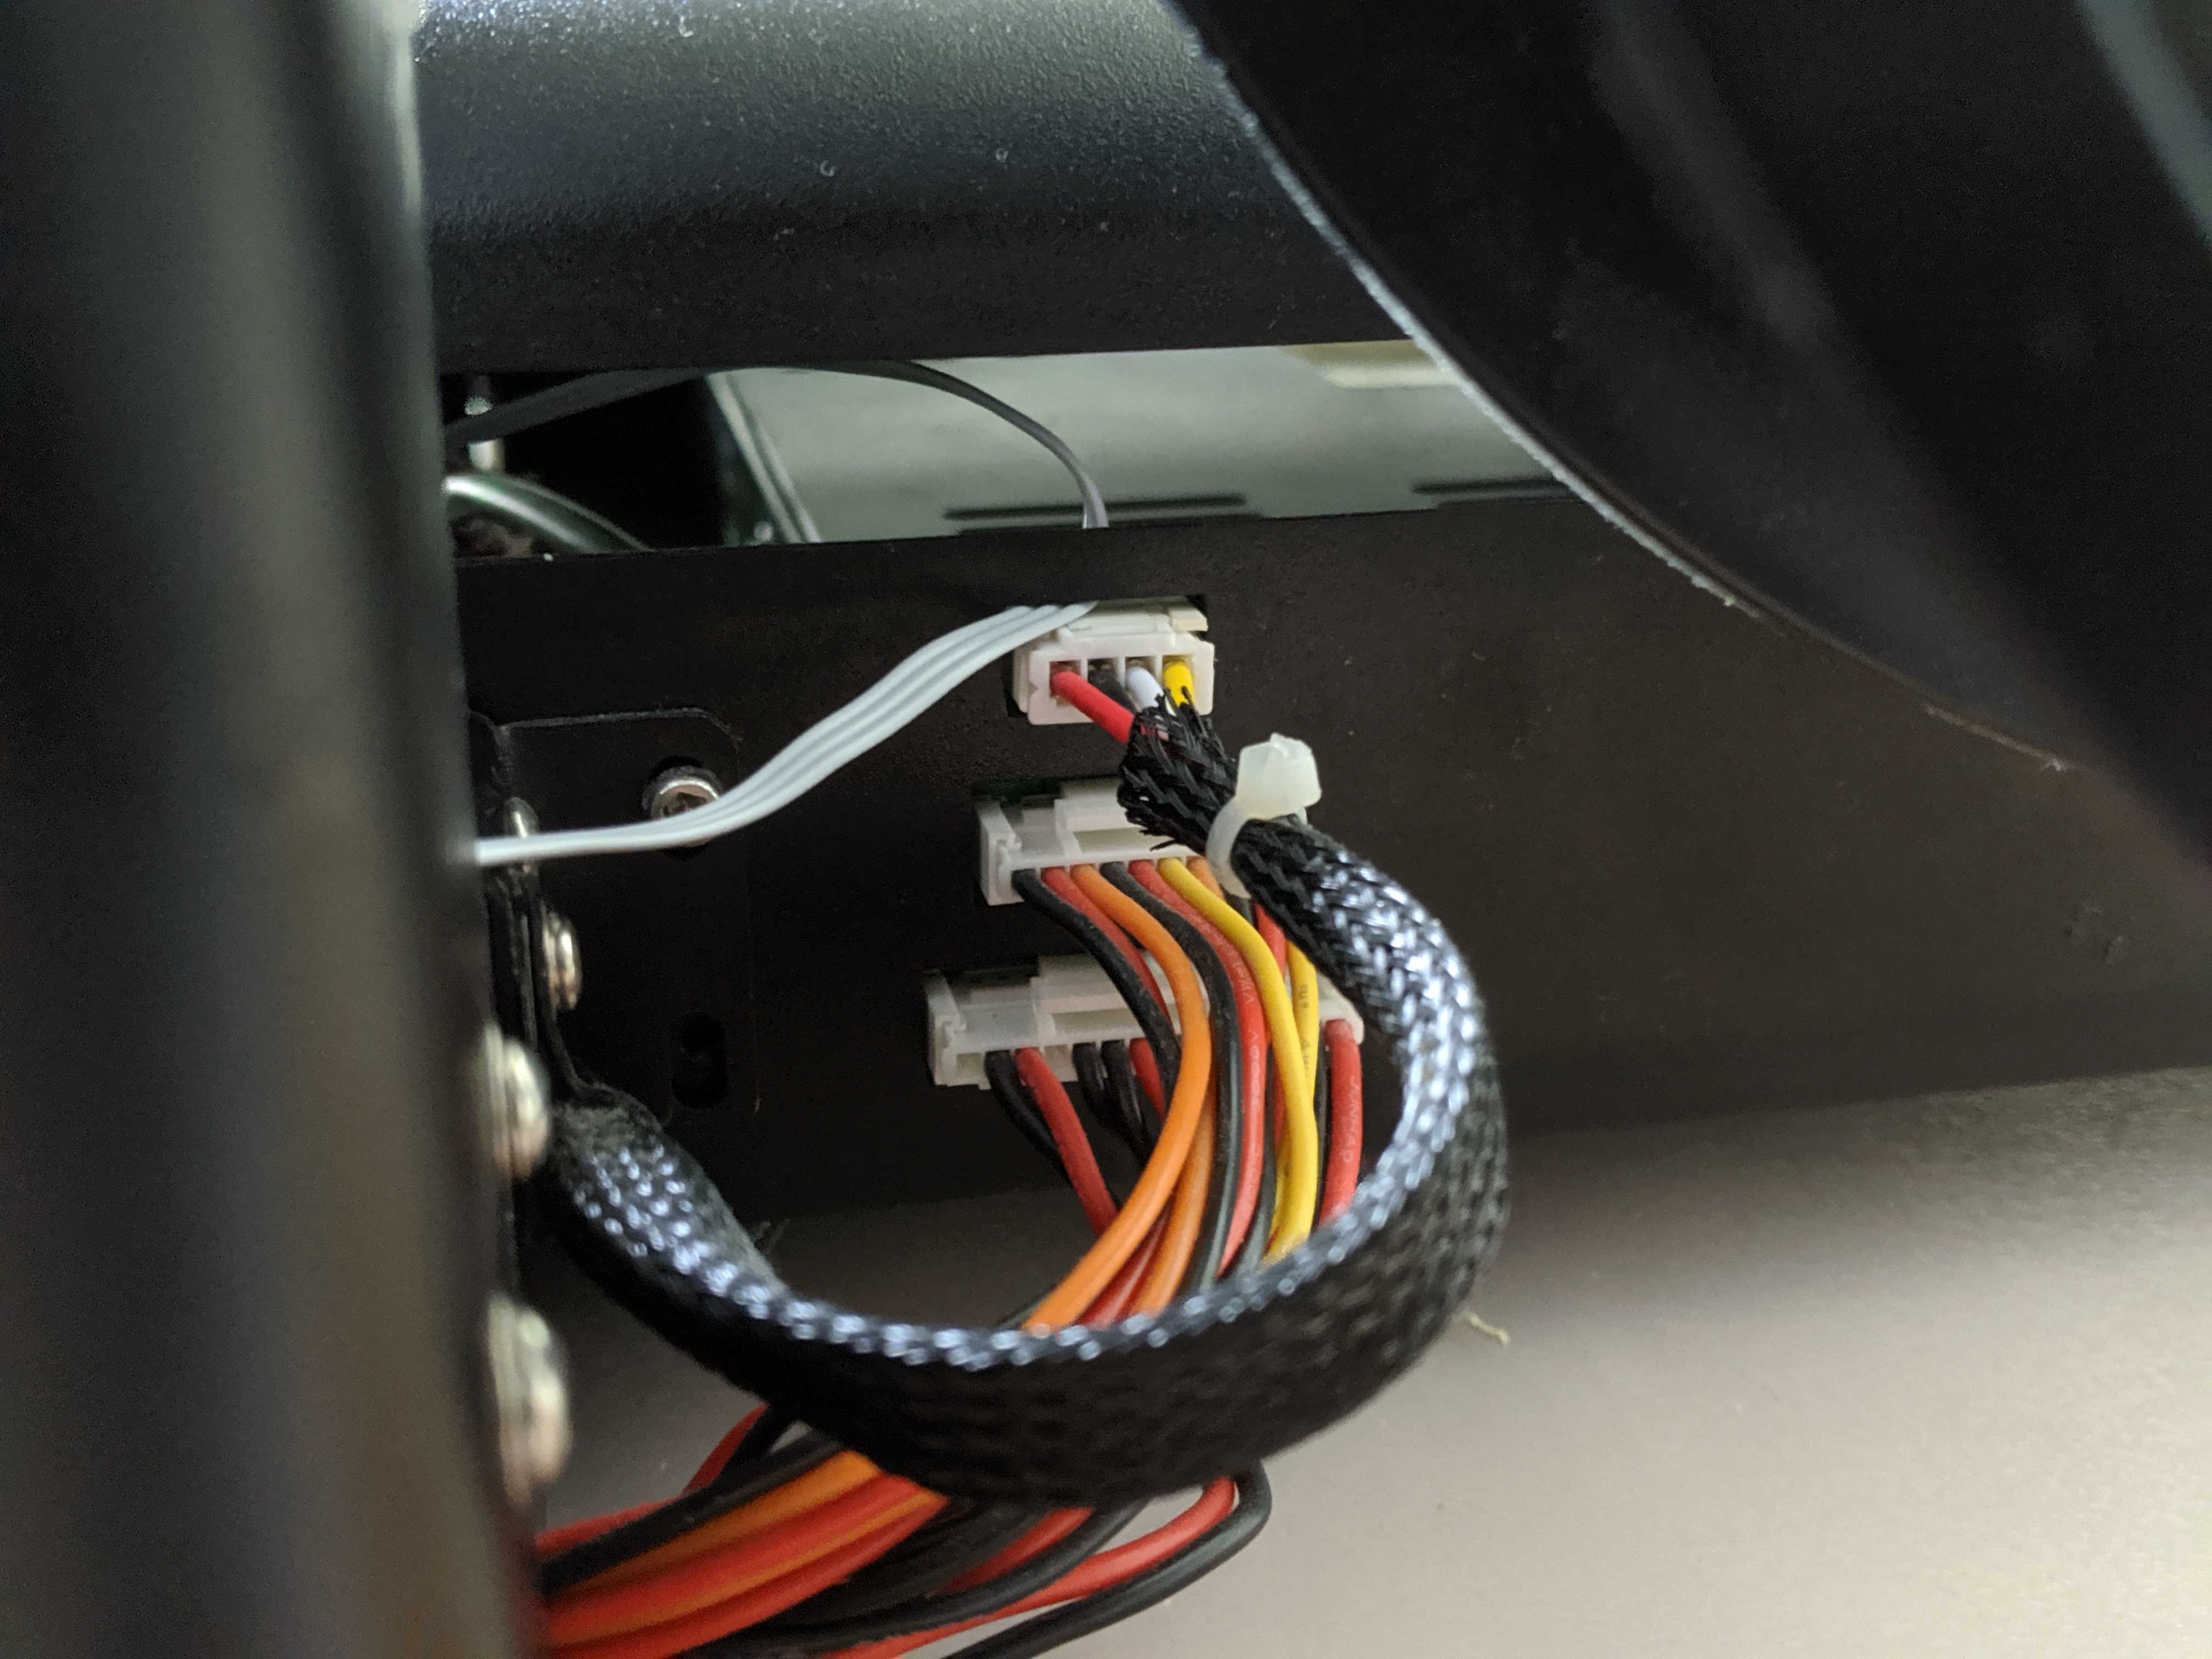
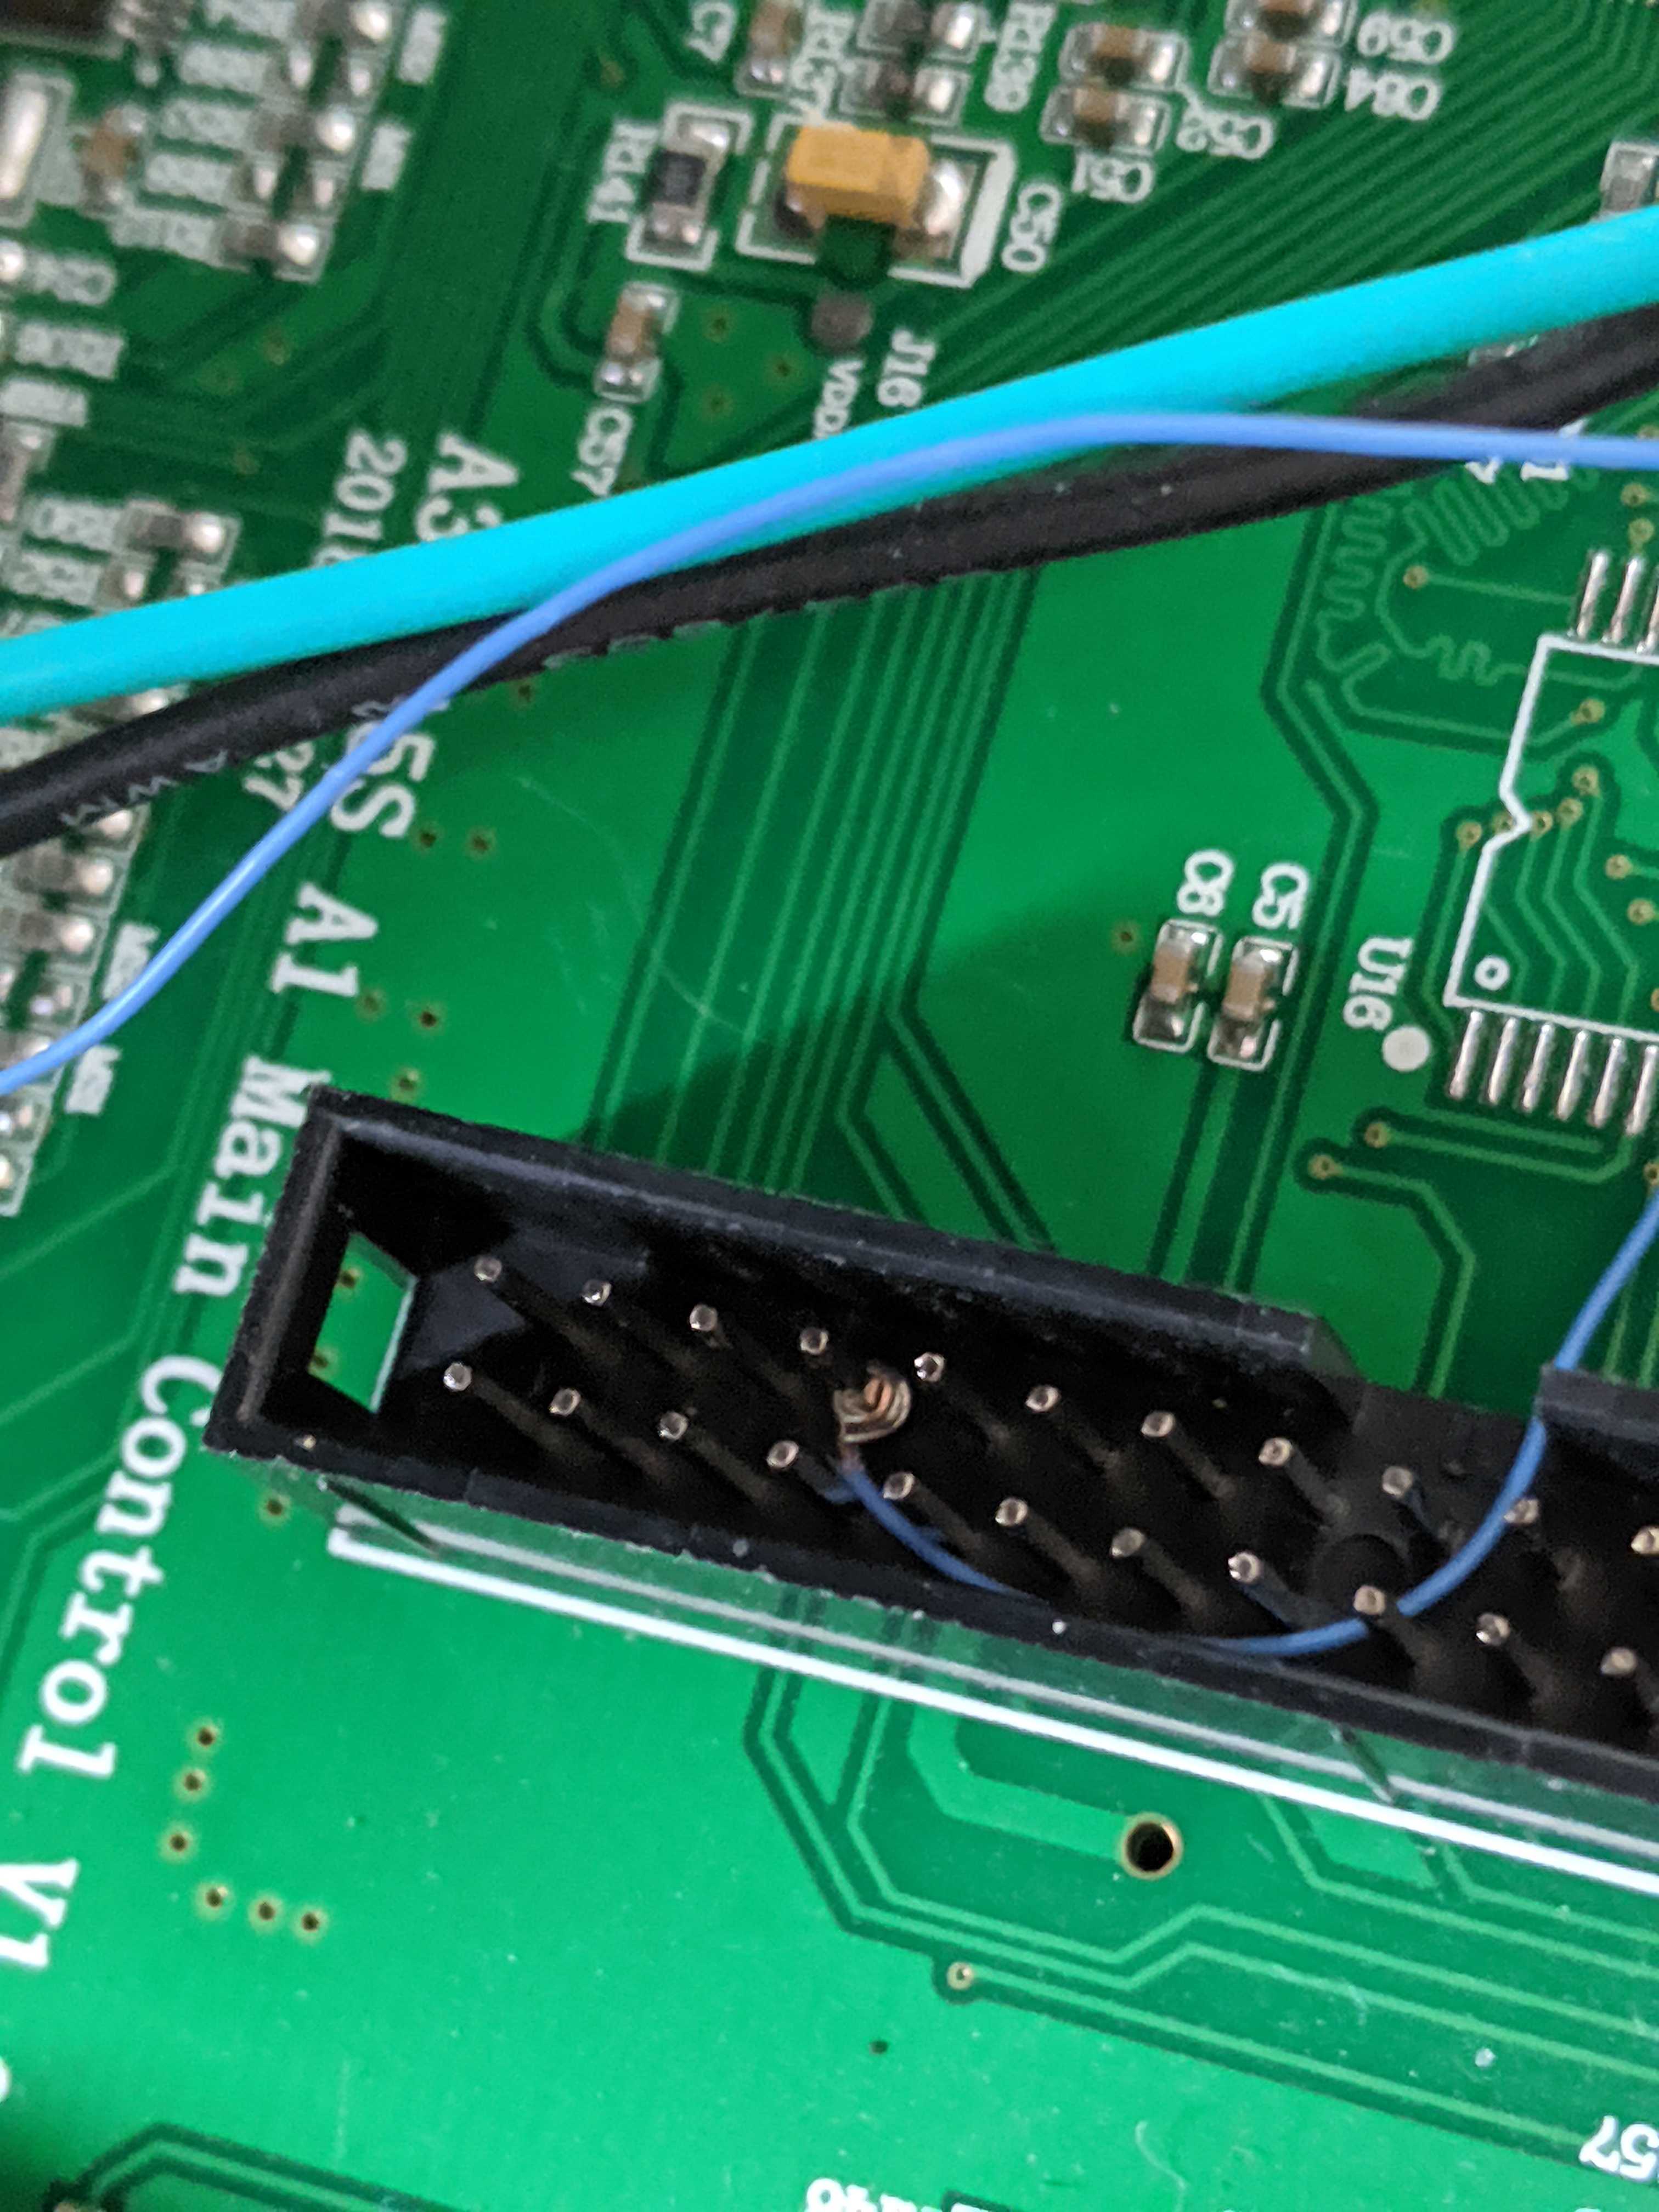
Open the chassis and remove the Z stop and LCD connector and you will need to wire the sensor as follow
OUT (Yellow) - Left pin of the green connector
GND (Black) - Middle pin on the green connector
VCC (Red) - Goes to the VCC pin in the LCD connector
Video on how to open the case https://www.youtube.com/watch?v=d6lRvYPSY7A
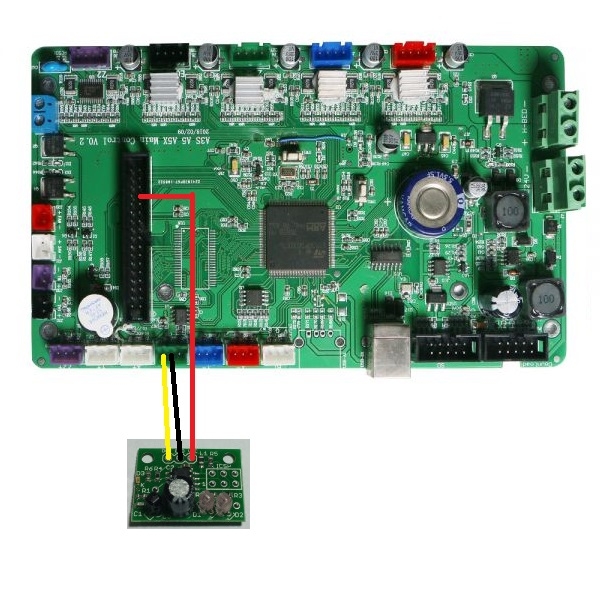
I used some blue wire on the LCD connector so you dont have to solder anything. The blue wire is thin enoug so you can still plug the LCDconector without issues.
If you use the same Dupont connector for the GND and OUT signal it won't fit perfectly, I added some piece of paper to make it fit right. It would be better to buy the proper connector. Notice that the orange cable in the following picture is not connected as I attached a blue wire to VCC. In this picture GND is red and OUT is black, don't get confused (thats how the cable came pre-assembled when I bought the sensor)

Close the case and you are ready to flash the attached firmware. I attached the original and modified configuration files in case someone wants to make some modifications.
When you turn on your printer you can test that the sensor is working if you put your and bellow it. It should turn on the red LED when your hand is close enough. If it doesnt do that, you should check your connections.
Once everything is ready you will need to calibrate your Z - axis. This is a good tutorial on how to do it:
https://www.youtube.com/watch?v=Q5M7DvdMcew
When you have your Z calibrated, you are good to go to push the auto-level option")
Credits:
Original post to install the IR Probe in the A5: https://jgaurorawiki.com/a5/bed-levelling-probe
Firmware is based on Samuel Pinchies source: https://github.com/pinchies/Marlin
Thingverse model from CdRsKuLL: https://www.thingiverse.com/thing:2750505
Da Hai Zhu video on how to open the case: https://www.youtube.com/watch?v=d6lRvYPSY7A
Remain Indoors tutorial on how to calibrate Z axis: https://www.youtube.com/watch?v=Q5M7DvdMcew
You will need:
Mini IR bed Sensor
Firmware (Attached in this post)
Mounting bracket
M3 Screws
First, you need to verify that the cable for your sensor is long enough. I used 3 lines of flat cable so it can be easily introduced in the chassis without modification.
Remove the front bar of the printer so you can mount the sensor with the help of the mounting bracket.
The screews that are in the X-axis aren't long enough to hold the metal part and the printed mounting bracket so you need to use the longer M3 screes
Connect the cable to the sensor. Be very careful on which colors are connected to GND, VCC and OUT signals as documentation sais that the sensor is very voltage sensitive.
Wire the sable through the frame
Insert the flat cable through the holes already made for other connectors
Open the chassis and remove the Z stop and LCD connector and you will need to wire the sensor as follow
OUT (Yellow) - Left pin of the green connector
GND (Black) - Middle pin on the green connector
VCC (Red) - Goes to the VCC pin in the LCD connector
Video on how to open the case https://www.youtube.com/watch?v=d6lRvYPSY7A
I used some blue wire on the LCD connector so you dont have to solder anything. The blue wire is thin enoug so you can still plug the LCDconector without issues.
If you use the same Dupont connector for the GND and OUT signal it won't fit perfectly, I added some piece of paper to make it fit right. It would be better to buy the proper connector. Notice that the orange cable in the following picture is not connected as I attached a blue wire to VCC. In this picture GND is red and OUT is black, don't get confused (thats how the cable came pre-assembled when I bought the sensor)
Close the case and you are ready to flash the attached firmware. I attached the original and modified configuration files in case someone wants to make some modifications.
When you turn on your printer you can test that the sensor is working if you put your and bellow it. It should turn on the red LED when your hand is close enough. If it doesnt do that, you should check your connections.
Once everything is ready you will need to calibrate your Z - axis. This is a good tutorial on how to do it:
https://www.youtube.com/watch?v=Q5M7DvdMcew
When you have your Z calibrated, you are good to go to push the auto-level option
Credits:
Original post to install the IR Probe in the A5: https://jgaurorawiki.com/a5/bed-levelling-probe
Firmware is based on Samuel Pinchies source: https://github.com/pinchies/Marlin
Thingverse model from CdRsKuLL: https://www.thingiverse.com/thing:2750505
Da Hai Zhu video on how to open the case: https://www.youtube.com/watch?v=d6lRvYPSY7A
Remain Indoors tutorial on how to calibrate Z axis: https://www.youtube.com/watch?v=Q5M7DvdMcew
Comments
Let me know if you need some help.
Howdy, Stranger!
RegisterIt looks like you've been lurking for a while.
If you register, we will remember what you have read and notify you about new comments. You will also be able to participate in discussions.
So if you'd like to get involved, register for an account, it'll only take you a minute!