Please note: the forum is closed.
No new user registrations are accepted. For more info, please click here.
No new user registrations are accepted. For more info, please click here.
Please help! 13 year old first time user
 bethandtom1again
Posts: 3Member
bethandtom1again
Posts: 3Member
Watched the JGAroura Magic video and put it together exactly. Leveled the tray and used a paper to check that the nozzle was the right height. The first time I went to print from the SD card- the tip scratched through the tray! What did I do wrong? Will it still work?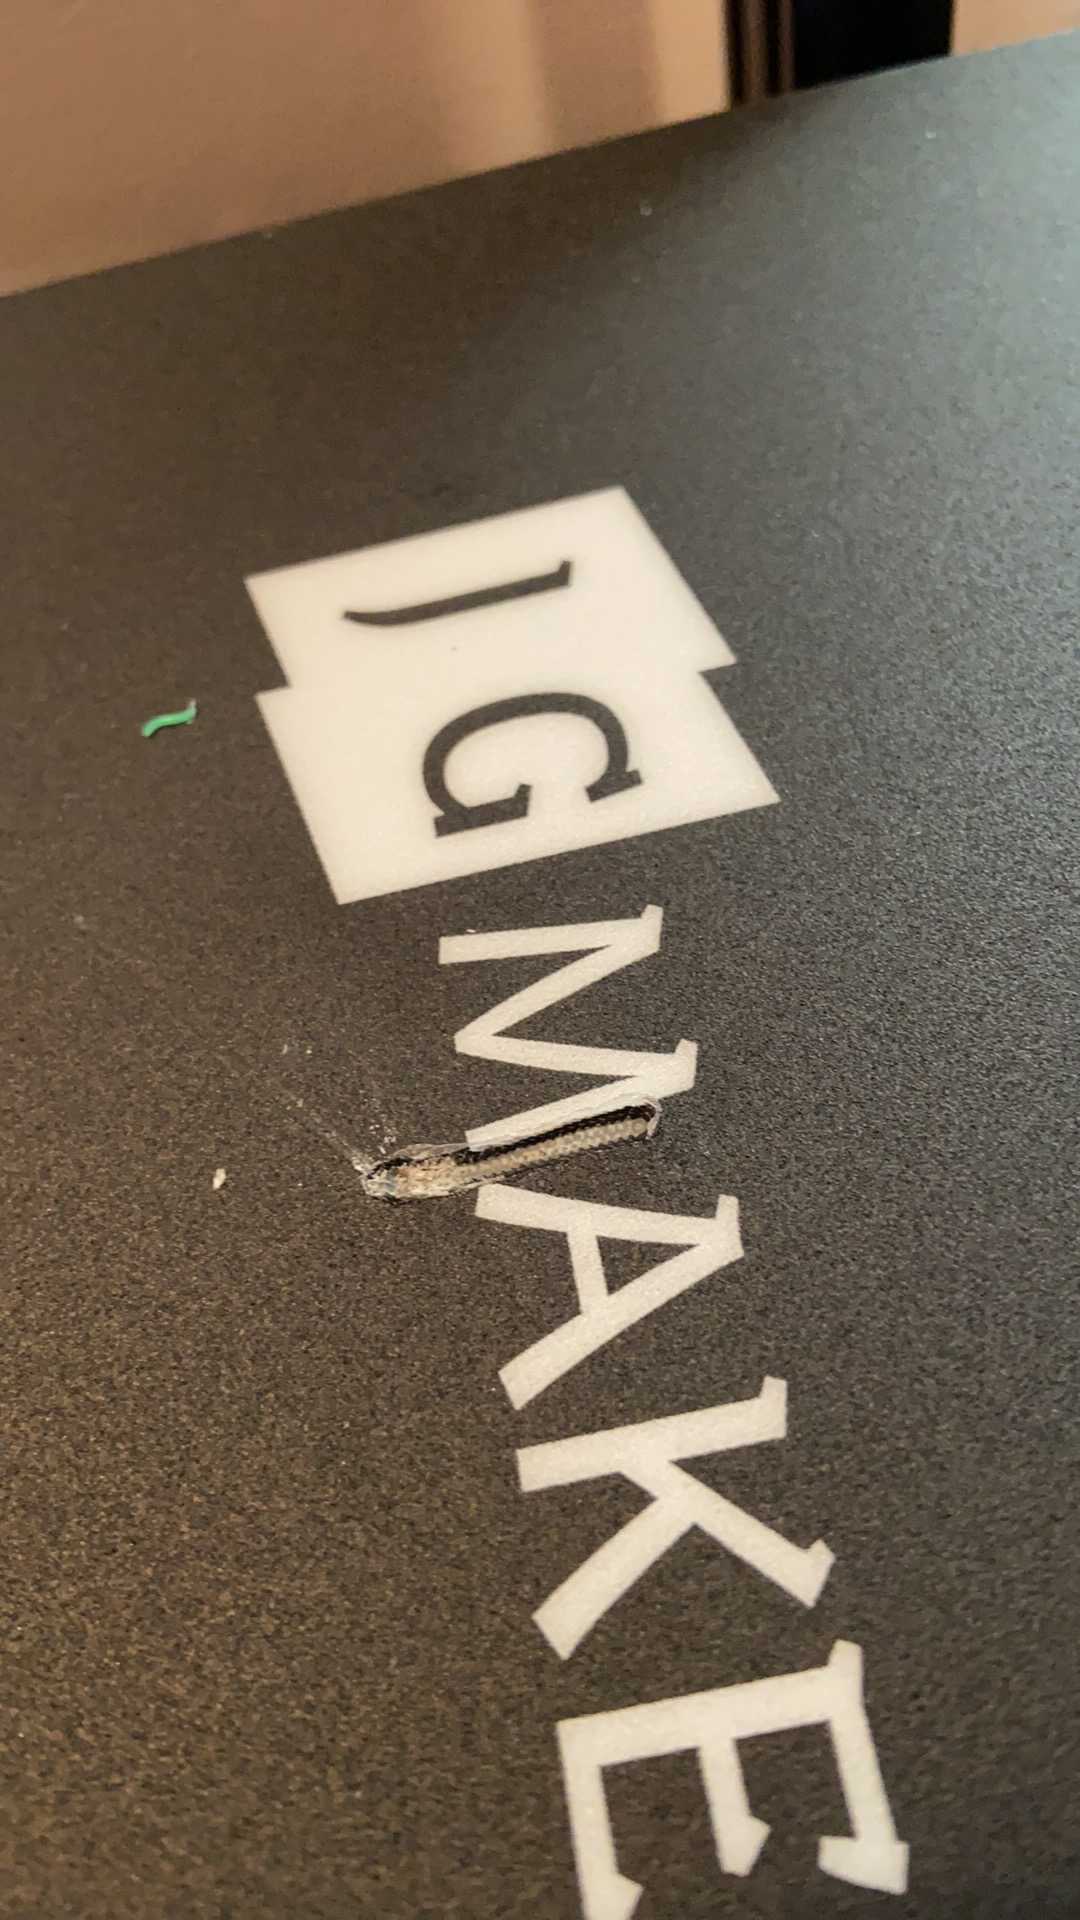
Comments
You can't print on the damaged section now - but you can move the models about in Cura so that they print on a different section of the build surface
You could buy a mirror tile and clip it to the build plate, and print on that - but you will need to smear glue stick or water diluted PVA paper/wood adhesive on the glass surface so that the hot filament will stick
They also sell PEI sheets in that size - PEI is far better than a PVC build sheet
3D Printing Build Surface, 3D Printer Heat Bed Platform Sticker Sheet for Ender 3 / Ender 3 Pro, 235x235mm (9.25"x9.25") Square, Pack of 4 https://www.amazon.com/dp/B07K81LGVC/ref=cm_sw_r_cp_api_i_5cvdEb5VVEGHA
Howdy, Stranger!
RegisterIt looks like you've been lurking for a while.
If you register, we will remember what you have read and notify you about new comments. You will also be able to participate in discussions.
So if you'd like to get involved, register for an account, it'll only take you a minute!