Homeβ€Ί JGAurora A5 & A3Sβ€Ί Getting Started & Troubleshooting

Print trail shifts whilst printing

MattMatt Posts: 314🌟 Super Member 🌟
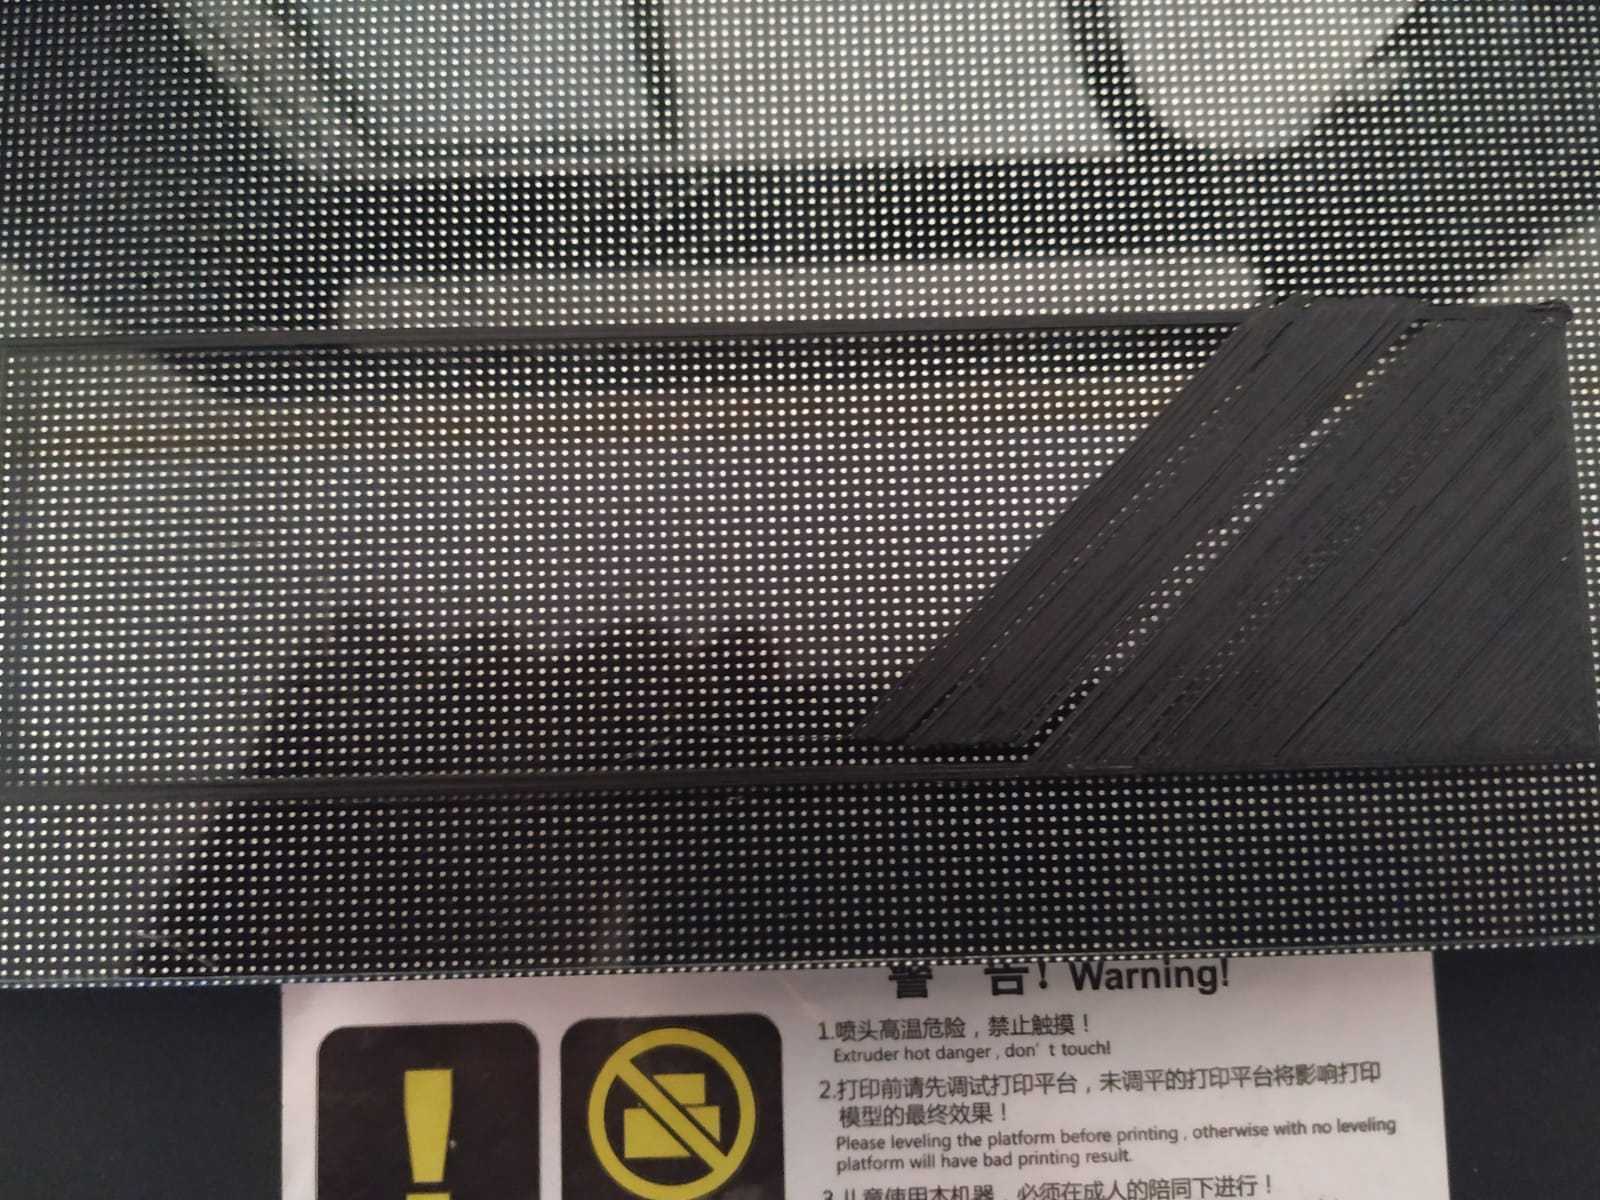
First printing attempt after recovery & flashing... I'm obtaining what's in the picture. At each layer shifting, a "tuck/thud" noise was heard from the printer... Lubricated with lithium the screws. Trying another attempt. Printed at 50% speed.
Live update: whilst I was writing this, the printer stopped printing and cried the beep which is done at startup, and apparently the printer restarted... Perhaps the firmware flashing was anyway badly done...
Now I'm at third attempt, 100% speed, and apparently is faring good.
Post edited by Matt on
Β«1345

Comments

  • MattMatt Posts: 314🌟 Super Member 🌟
    edited February 2021
    Ok, the third attempt seems going good. The print has passed the crucial part where the shifting appeared, although these rumors are surfacing anyway (but without affecting the print, apparently). Perhaps they come from the y-axis moving, which belt probably has loosened when opening/closing the case so many times? Though, the printed stripes don't shift anyway.
    Update 14.27: now they begun to shift....... :/ Although not as much as before. Hope it will be contained. Anyway, must I open the case (again...) and tighten the belt?
    Update 14,30: the trail set back to the correct path, but the thuds are still there. Now going onto the second layer.
    Update 14,50: at some point at 3/4 to the end began a very huge shifting with more frequent thuds.
    Post edited by Matt on
  • MattMatt Posts: 314🌟 Super Member 🌟
    edited February 2021
    4th layer: the shifting is conform with the one of the third layer, and the noises became more frequent
    Update 16,20: it is at half job, and it's continuing conformly upon the shifted layer. So far doesn't make other overshifted layers.
    Post edited by Matt on
  • michalko99michalko99 Posts: 153Member, 🌟 Super Member 🌟
    while replacing mainboard and drivers, did you set correct Vref on them? If it is too low, it can skip steps and shift axis
    Thanked by 1Samuel Pinches
  • MattMatt Posts: 314🌟 Super Member 🌟
    edited February 2021
    Hi Michalko. No, I didn't setted it. Also 'cause so far it isn't so clear to me how to do it (I remember Sam sent me a pic, but I forgo it 'cause it was looking hard for me, sparing its study for quieter times, meanwhile I was committed with the gross job), except from that it looks somewhat difficuIt for a non-tech user and that it must be done with a non-conductive screwdriver. Btw, I've guessed it wasn't mandatory, due I thought the steppers moved fine by stock, after flashing: evidently I ignored that a thing is the movement, another the printing.
    Post edited by Matt on
  • michalko99michalko99 Posts: 153Member, 🌟 Super Member 🌟
    it is not that hard how it looks and sounds. You can even use normal screwdriver, when you have no shaky hands. even TMC2208 drivers comes with metal screwdriver.Β 

    herer it is>
    https://jgaurorawiki.com/a5/stepper-drivers

    If you have stock A4988 drivers, you find table in article for each axis Especially Y axis is critiacal, as it needs to move big mass of material-hotbed


    You need flat tip screwdriver-best is from kit for repairing watch, as it need very small tip and digital multimeter to correctly set Vref voltage.

    No need to worry for setting exactly specific value. +/- 50 milivolts does not play critical role. Easiest way is to make small movement of trimmer on driver and measure voltage. Then again rotate and remeasure..
    Thanked by 2Matt Samuel Pinches
  • MattMatt Posts: 314🌟 Super Member 🌟
    TY Michal, hope I'll be successful. When this test print will be over, I'll try the job.
  • michalko99michalko99 Posts: 153Member, 🌟 Super Member 🌟
    Remember If you have stock drivers, you do not need to connect AC power. Just USB from computer will be enough to power-up stepper drivers
    Thanked by 1Samuel Pinches
  • MattMatt Posts: 314🌟 Super Member 🌟
    A friend of mine is telling me that he could fetch the screwdriver: only he have to know what size it should be.
  • michalko99michalko99 Posts: 153Member, 🌟 Super Member 🌟
    hard to tell...better ask for whole set. You will then try which one fits best.These are Chinese trimmers, so no specific standrad I think
    Thanked by 1Matt
  • MattMatt Posts: 314🌟 Super Member 🌟
    Yeah I see, 2 euros a set of 4 from China (but 30-50 days travel...) vs 13 euros from Amazon...
  • michalko99michalko99 Posts: 153Member, 🌟 Super Member 🌟
    China...New year celebration starting right now, so expect more than 2 months...
  • MattMatt Posts: 314🌟 Super Member 🌟
    Well, yes.
  • MattMatt Posts: 314🌟 Super Member 🌟
    Final "results"...
  • michalko99michalko99 Posts: 153Member, 🌟 Super Member 🌟
    hmmmm. really ugly...All shifted in Y axis I assume. This might be really easy fix if you set stepper driver properly. If X and Z are working properly, do not change them, just from curiosity remeasure
    Thanked by 1Samuel Pinches
  • MattMatt Posts: 314🌟 Super Member 🌟
    edited February 2021
    Remeasure? Not sure I understand. The other axes look working good.
    Post edited by Matt on
  • michalko99michalko99 Posts: 153Member, 🌟 Super Member 🌟
    just measure it-possibly not needed to adjust Vref, Because your extruder looks ok from provided picture. X axis is also OK.Β 
  • MattMatt Posts: 314🌟 Super Member 🌟
    Ah, but what if the measure is in range?
  • michalko99michalko99 Posts: 153Member, 🌟 Super Member 🌟
    Then you might have problem with bearings on axis, but this is less potential and would look more jerky...Your shifts are linear...I changed mine after 2 years just because I had original from MISUMI from my work. There is nothing else which can be wrong. I have 5 printers and currently I am drawing 6th in Fusion360. Just for hobby, not for money. When Vref is set to low value, axis will lose some steps during changing of direction-this leads to shifted layers.Β 

    do not worry..It is job for 15 minutes + disassembly and assembly of printer
    Thanked by 2Matt Samuel Pinches
  • MattMatt Posts: 314🌟 Super Member 🌟
    edited February 2021
    Oh well... The opening of the case is everytime a pain... What kind of printer are you building now?
    Post edited by Matt on
  • MattMatt Posts: 314🌟 Super Member 🌟
    edited February 2021
    Er... The drivers are Arceli, not Pololu or Rsense. Dunno which production year. The voltage stands the one still on the tables?
    Post edited by Matt on
  • MattMatt Posts: 314🌟 Super Member 🌟
    edited February 2021
    It seems that the screwdriver should be a 1,5 cut-type. Though in amazon one must buy a set of 8 for the lowest spending (13 euros), against 3 from China for a set of 5...
    But, must the printer be shutted down when tuning? And when measuring the voltage?
    Post edited by Matt on
  • michalko99michalko99 Posts: 153Member, 🌟 Super Member 🌟
    Hi. Are these drivers onboard?

    https://www.amazon.com/ARCELI-Compatible-Stepper-StepStick-Controller/dp/B07MY2SWQ5

    If yes, table with voltages is same.It isΒ  just rebrand.

    To the new printer..My plan is to build printer with direct drive, based on linear rails, not smooth rods and not cartesianΒ  style. I already made X axis. This will be long run to finish anyway as everything is closed here in Slovakia :smile:
  • MattMatt Posts: 314🌟 Super Member 🌟
    edited February 2021
    Onboard? You mean if they came already attached to the board bought? If you meant this, they aren't: I bought them separately on amazon.
    Oh DD? perhaps we may have many things to chat about then. I transformed this a5 in DD (although I experimented many problems with this bulky stepper which I mount, which is the stock one of the printer, adapted to work as DD: I tried many slim steppers, but didn't worked, evidently 'cause I had had tuned the vref and/or adapted the pins to the a5 layout...), and I have in mind to build a simple cartesian of 500x500 someday (I have some spare steppers, or to use them for building a 1mx1m laser cutter, providen that I may fetch plan/infos for that, and that I'll be able to repair finally this a5).


    Post edited by Matt on
  • michalko99michalko99 Posts: 153Member, 🌟 Super Member 🌟
    so if you purchased all of them as brand new, you must set all by adjusting Vref.. If some of them are set higher voltage, your steppers will run hot during long prints. If this happens to extruder, it will melt PLA filament directly on gear.

    Also if they are set too high, drivers will overheat and shutdown for a while until they cools down below threshold


    Thanked by 1Matt
  • MattMatt Posts: 314🌟 Super Member 🌟
    edited February 2021
    Ok, I'll vref 'em all. Better to operate without courent and unplugged anyway, or upon unsocketed drivers?
    Post edited by Matt on
  • michalko99michalko99 Posts: 153Member, 🌟 Super Member 🌟
    no no. they must be inserted into mainboard and mainboard must be connected to USB power. This will power up stepper drivers and you can adjust Vref. without power, you will read 0V all the time.

    You do not need AC power for this step, so less dangerous
    Thanked by 1Matt
  • MattMatt Posts: 314🌟 Super Member 🌟
    edited February 2021
    Ok, hope in luck: I do not have time to wait for the screwdrivers from China and I don't want to spend 13 euros for those from Amazon... So I have to work with normal screwdrivers.
    Should I remove the ac cord too?
    Post edited by Matt on
  • michalko99michalko99 Posts: 153Member, 🌟 Super Member 🌟
    if you disconnect it, noting bad will happen. Its just for your safety
    Thanked by 1Samuel Pinches
  • MattMatt Posts: 314🌟 Super Member 🌟
    Ok. Before you told me this, I've thougt to test it to see how much volts it is now, then shut the printer and remove it from the socket, screw it, put it again in the socket and turn up the printer to test the new voltage.
  • michalko99michalko99 Posts: 153Member, 🌟 Super Member 🌟
    any progress?
    Thanked by 1Samuel Pinches
Sign In or Register to comment.