Please note: the forum is closed.
No new user registrations are accepted. For more info, please click here.
No new user registrations are accepted. For more info, please click here.
Finally designed a JGMAKER Magic direct drive
For anyone who would like to convert their bowden setup to direct drive, i'd say try it. Prints are coming out immaculate.
Im selling the model in Cults3d.
Money earned will be for more R&D to upgrade jgmaker.
Goal is to have it free once im contented with the upgrades.
Sorry for the janky setup. Still deciding to add quick release for the hot end for faster maintenance along with wire connector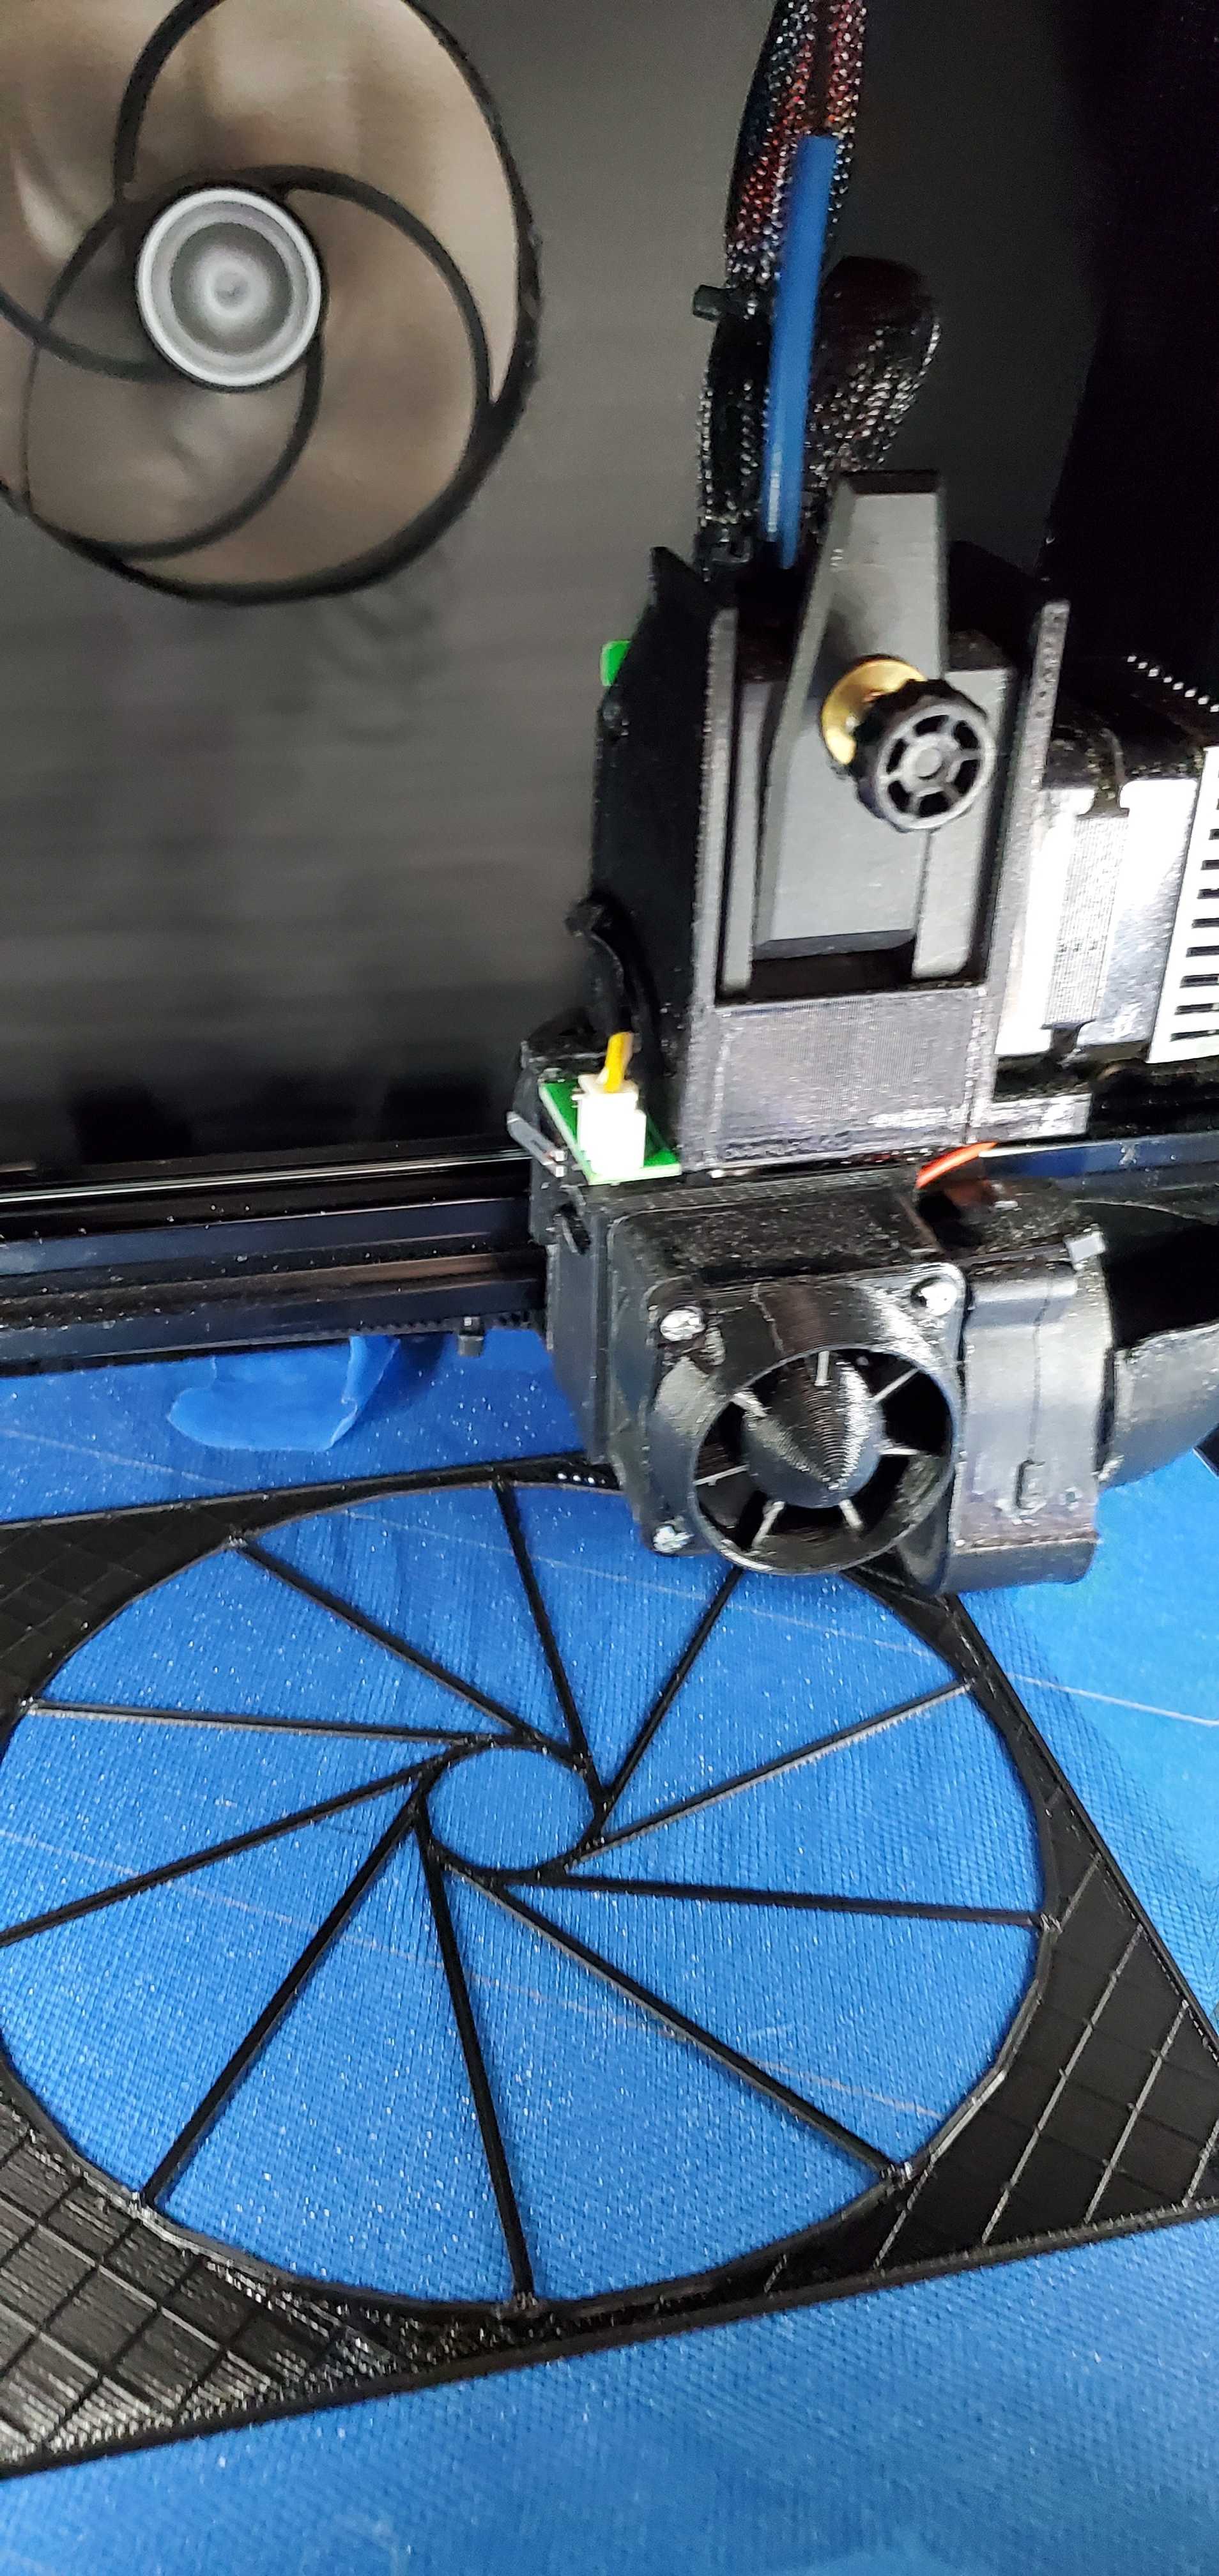


Im selling the model in Cults3d.
Money earned will be for more R&D to upgrade jgmaker.
Goal is to have it free once im contented with the upgrades.
Sorry for the janky setup. Still deciding to add quick release for the hot end for faster maintenance along with wire connector
Thanked by 1Samuel Pinches
Comments
Do you have the parts list for the extruder and fans you used?
every design I’ve sketched stops with the board.
mid like to see it opened up if it’s not too much to ask
i ended up throwing that hotend board and used VGA connector on my new design. Easy cleaning and maintenance.
question is: can I run just two wires to the heater block and tc and forget the jumper. Is the jumper serving any purpose?
I may have a few more question as I’ve been looking to reduce and simplify their design.
regarding with the "jumper" i believe that's only to supply the limit switch with 24V. Its common power.
i may have to dig through my junk bin to find that pcb
generally, thats just relates to how much heat it can produce.
higher power=more heat and faster heating time (not much) but more dangerous so you need to have a good board that has many safety stuff activated like thermal runaway.
are you running on a stock board btw?
And I DO have thermal runaway FOR SURE lol been getting that error a lot when running my part fan for extended times. I tried running the fan while PiD (50%) but my heater core is having a hard time catching up. Reason I’m researching the 40w.
did you do auto pid yet? kinda odd running fan and presents thermal runaway error for prolonged use...
i have my end script to run the part fans at 100% on top of print too cool it faster for bed to release. and sometimes i forget they're on lol
I think I’ll try the 40w and just keep an eye on it and make sure I don’t burn the place down. Lol
if all works well I’m going to try and attack the wires to my hot end assembly again. I really like how the PCb looks compact in your above photos.
- quiet stepper drivers
- more memory to run more features
- more pin io
- can handle more power
- you have to alter the program based on your needs which means you know the ins and outs
- some board has wifi capability
- easier integration for custom parts and custom tasks
disadvantages:- you have to install it lol
- wiring nightmare (i dont really care at this point, ziptie everything!)
- custom stepper driver cooling system
my upgrades so far:(hardware)
- abl
- textured glass bed
- intake/exhaust equipped enclosure (planning to automate this)
- custom part cooler (upgraded the above pics)
- dual 5050 blower part cooler
- 30mm hotend heatsink cooler, activates at 50deg C
- skr 1.4 turbo board with silent drivers
- optical endstops
- added raspi 3b+ (got it for $20 lol) and camera
- all metal hotend
- 40W heater cartridge
- VGA connector for hotend
- bondtech direct drive mod (much closer to heatsink now) with pancake motor
- ceramic linear bearings
- silicon heatbed springs
(software)- 9 point bed levelling dual touch
- auto pid (hotend and bed)
- led light status colors
- octoprint enabled
- linear advance
- custom start/end scripts
- etc
i forgot some but let me know if you're planning to go down this path loli have other stuffs lying around my room that i can put in just to overkill the upgrade.
dont get me wrong, its just i love tinkering
Howdy, Stranger!
RegisterIt looks like you've been lurking for a while.
If you register, we will remember what you have read and notify you about new comments. You will also be able to participate in discussions.
So if you'd like to get involved, register for an account, it'll only take you a minute!