Please note: the forum is closed.
No new user registrations are accepted. For more info, please click here.
No new user registrations are accepted. For more info, please click here.
Cold End Fan Controller Upgrade
Hello,
a few days ago I got my A5. The Z-axis couplers were bent and the plug of the filament-out sensor had no contact, although correctly plugged and glued. Thanks to this forum, I had ordered a replacement coupler early on and was able to put the printer into operation.
It's a nice printer that I wanted to put in the living room. The printer is too loud. The disturbing noises come from the fans and the stepper motor drivers. I already ordered TMC2208 drivers. These will hopefully solve the noise problem of the X & Y axis. To cool the motherboard, I installed a 24 Volt 80x80mm Sunon fan with Vapo bearings. At 24 volts, the fan was still too loud for me. I experimented with different zener diodes to reduce the voltage on the mainboard fan. Now the fan is only audible when you go with the ear very close to the fan.
An automatic electronic fan control with speed controller seemed to me the right solution.
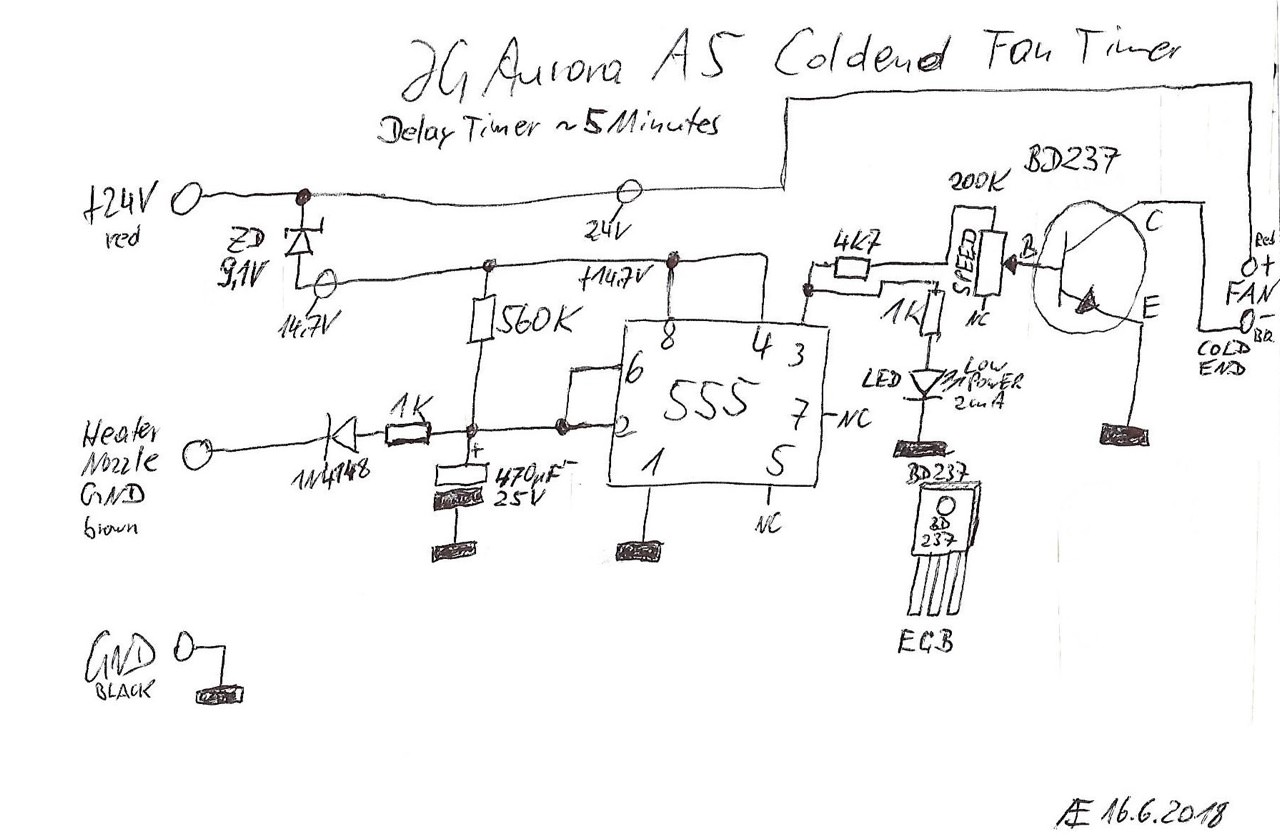
The circuit has the following properties:
1. Activate the Cold End Fan only when needed
2. Delayed Cold End Fan shutdown (about 5 minutes) after the last hot end activity.
3. Stepless adjustment of speed and noise.
4. Use of alternative fans from 5 to 24 volts.
How it works:
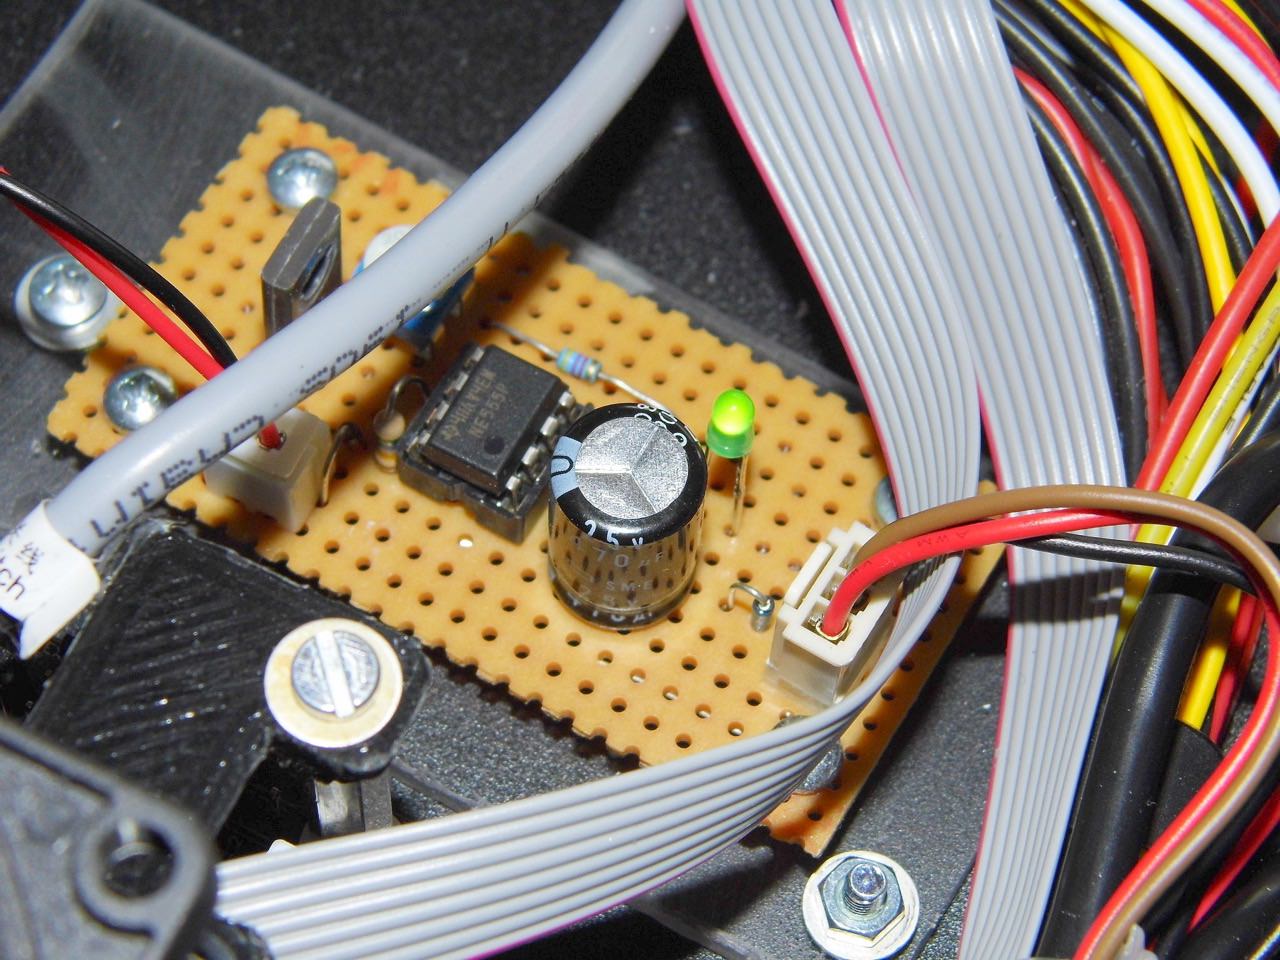
After switching on the printer, the Coldend fan runs at a reduced speed for approx. 5 minutes (if the hotend is still hot) and then switches off. Enjoy the silence. As soon as the Hotend is activated by the mainboard, the Coldend fan switches on as long as the hotend is active. After about 5 minutes no activity has taken place, the Coldend fan turns off. For me the Hotend had a temperature of 73 ° C when the fan was switched off.
This value depends on the set fan speed and the lag time.



a few days ago I got my A5. The Z-axis couplers were bent and the plug of the filament-out sensor had no contact, although correctly plugged and glued. Thanks to this forum, I had ordered a replacement coupler early on and was able to put the printer into operation.
It's a nice printer that I wanted to put in the living room. The printer is too loud. The disturbing noises come from the fans and the stepper motor drivers. I already ordered TMC2208 drivers. These will hopefully solve the noise problem of the X & Y axis. To cool the motherboard, I installed a 24 Volt 80x80mm Sunon fan with Vapo bearings. At 24 volts, the fan was still too loud for me. I experimented with different zener diodes to reduce the voltage on the mainboard fan. Now the fan is only audible when you go with the ear very close to the fan.
The cold end fan is a real annoyance. It always runs as soon as the printer is turned on. No matter if it is needed or not. I had to do something. As I said, I would like to maintain the given design so a mechanical adjustment was out of the question. The Cold End fan always runs unregulated because this is the cheapest solution. From the perspective of JGAURORA that is understandable. From the user's point of view less.
An automatic electronic fan control with speed controller seemed to me the right solution.
The circuit has the following properties:
1. Activate the Cold End Fan only when needed
2. Delayed Cold End Fan shutdown (about 5 minutes) after the last hot end activity.
3. Stepless adjustment of speed and noise.
4. Use of alternative fans from 5 to 24 volts.
How it works:
After switching on the printer, the Coldend fan runs at a reduced speed for approx. 5 minutes (if the hotend is still hot) and then switches off. Enjoy the silence. As soon as the Hotend is activated by the mainboard, the Coldend fan switches on as long as the hotend is active. After about 5 minutes no activity has taken place, the Coldend fan turns off. For me the Hotend had a temperature of 73 ° C when the fan was switched off.
This value depends on the set fan speed and the lag time.
Installation:
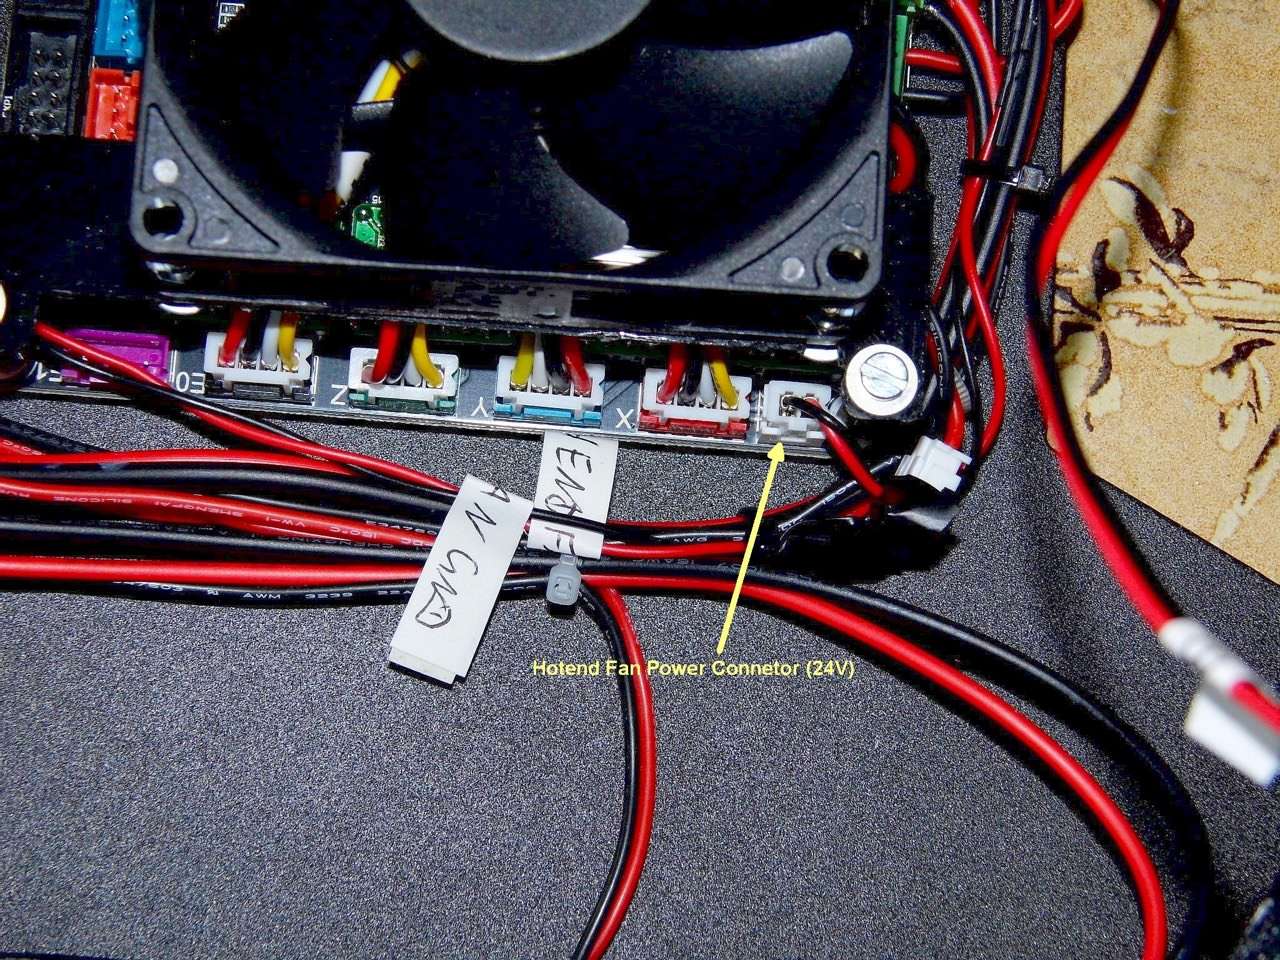
The coldend fan is supplied from the factory via a two-pin white plug with 24 volts.
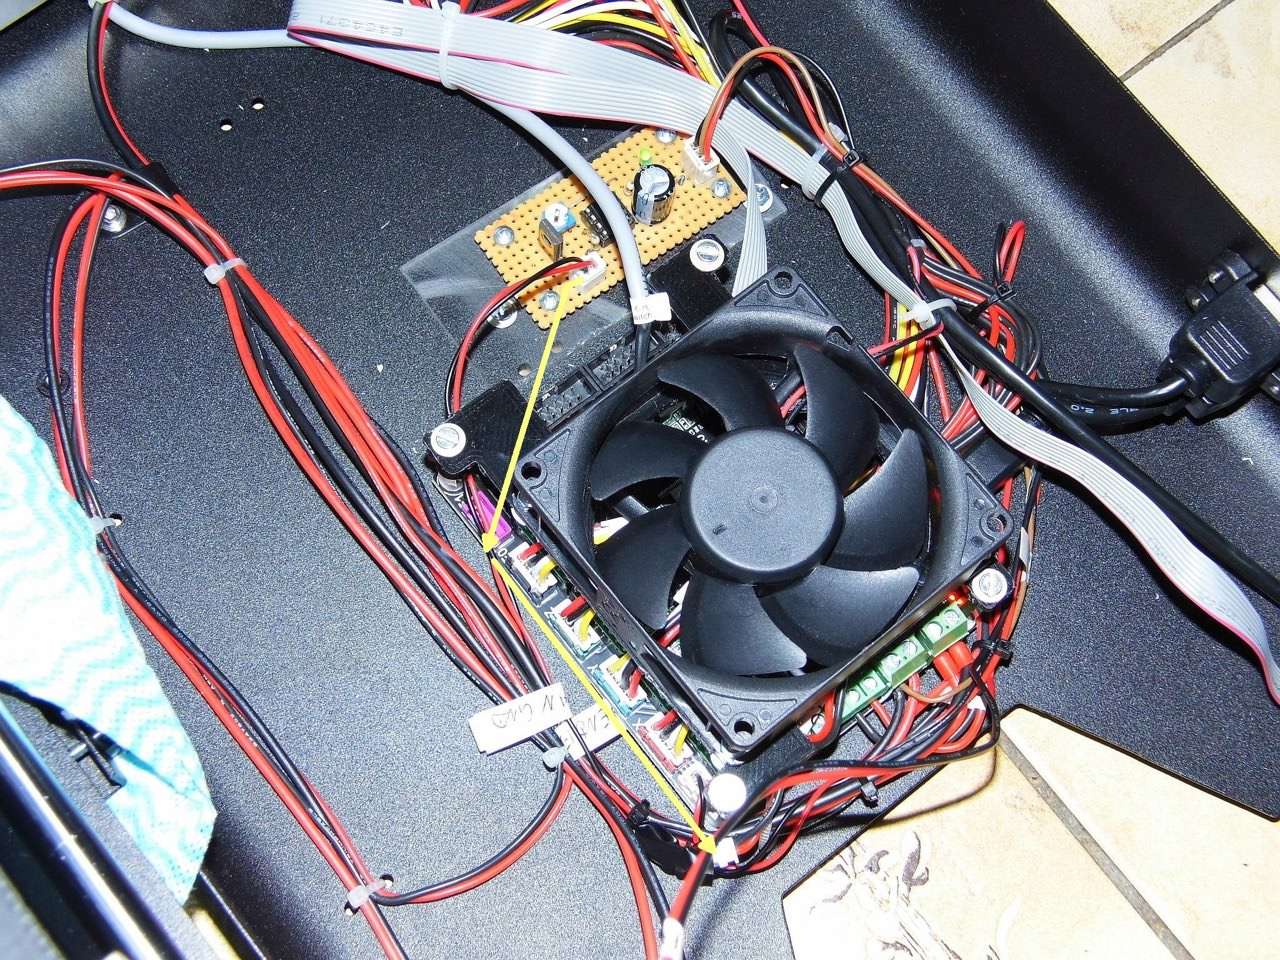
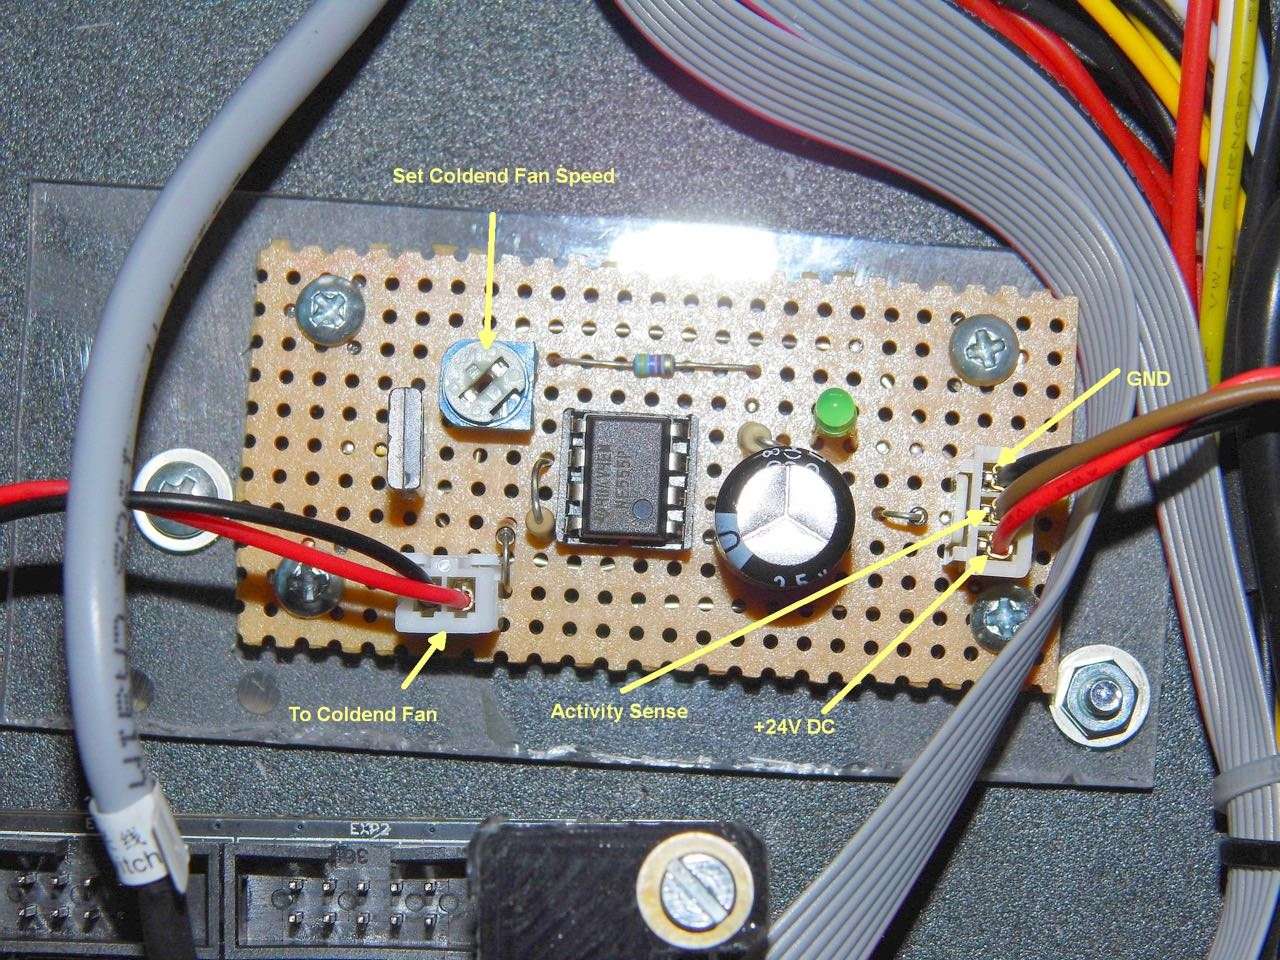
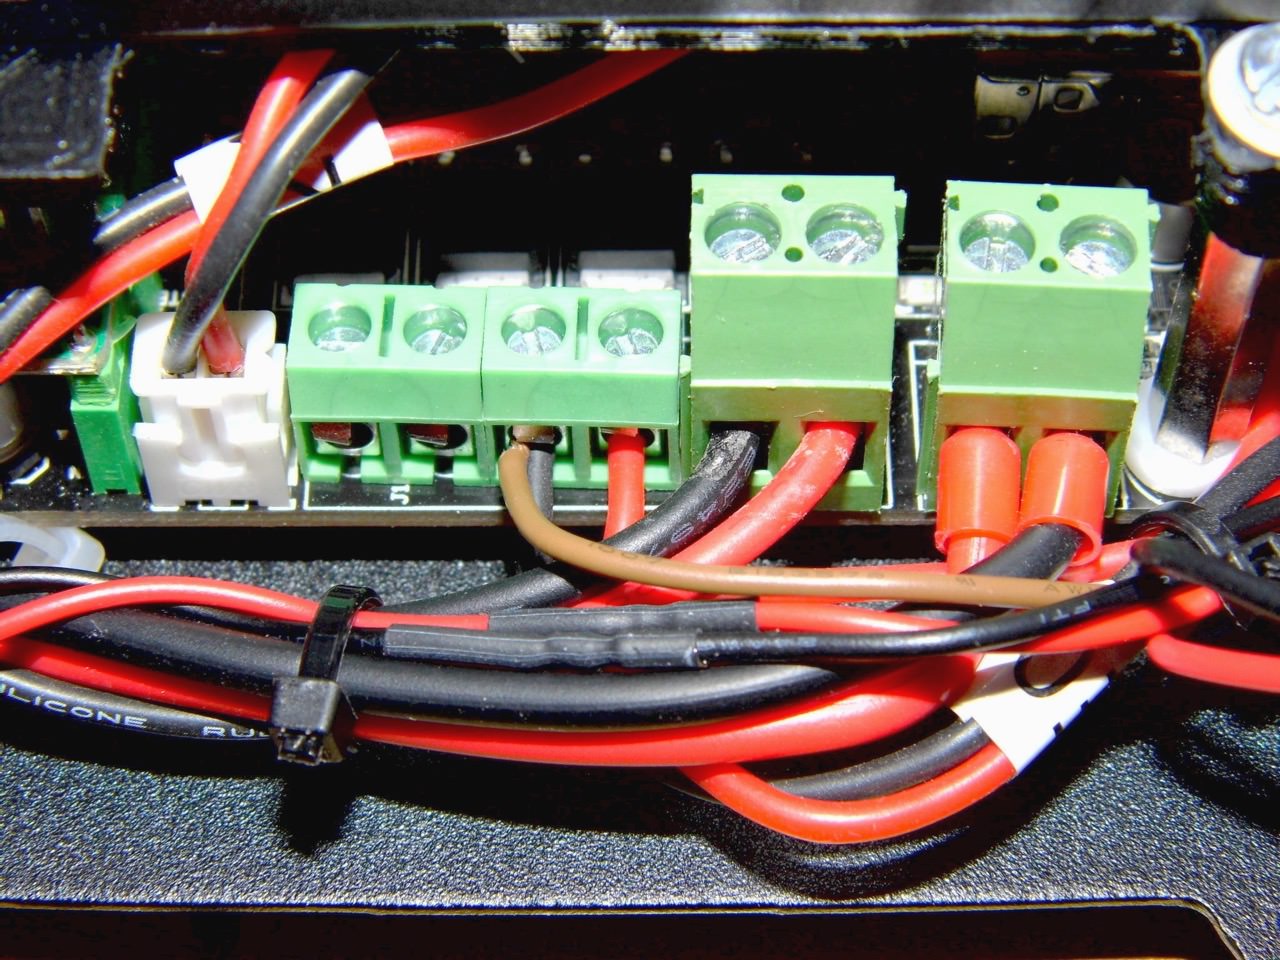
I pulled this plug out of the mainboard and installed my circuit in between. In addition, a connection must still be established to determine the Hotend activity (brown wire).
The coldend fan is supplied from the factory via a two-pin white plug with 24 volts.
I pulled this plug out of the mainboard and installed my circuit in between. In addition, a connection must still be established to determine the Hotend activity (brown wire).
Note:
As soon as the green LED lights, the fan should turn. If not, then the minimum speed must be increased.
As soon as the green LED lights, the fan should turn. If not, then the minimum speed must be increased.
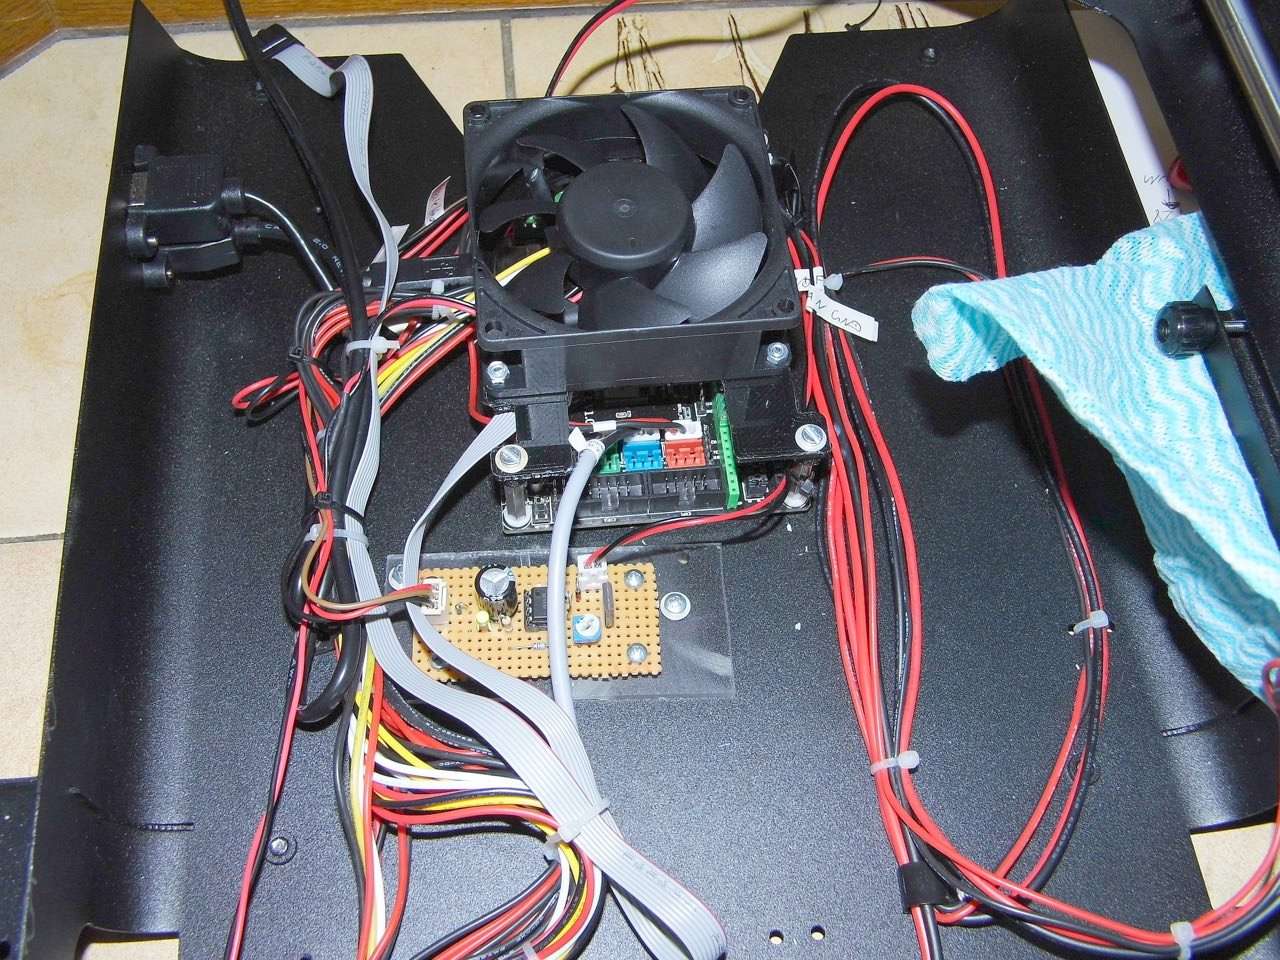
Overview:

Control Circuit (Note: On the photos the 1k resistor is not visible)


Coldend Power Fan Connector (pull out to place control citrcuit in between)

New Coldend Fan Output:

Connections:

Hotend Activity Sense Connection:


Schematics:

Post edited by AETEK on
Comments
Howdy, Stranger!
RegisterIt looks like you've been lurking for a while.
If you register, we will remember what you have read and notify you about new comments. You will also be able to participate in discussions.
So if you'd like to get involved, register for an account, it'll only take you a minute!